How to set up your Contentpen workspace? A beginner’s guide
Setting up your Contentpen workspace is super easy, and it only takes a few minutes to get started.
Whether you’re a content marketer, agency, or brand strategist, this setup guide will help you personalize your workspace and tailor it to your content needs.
So let us walk you through the steps:
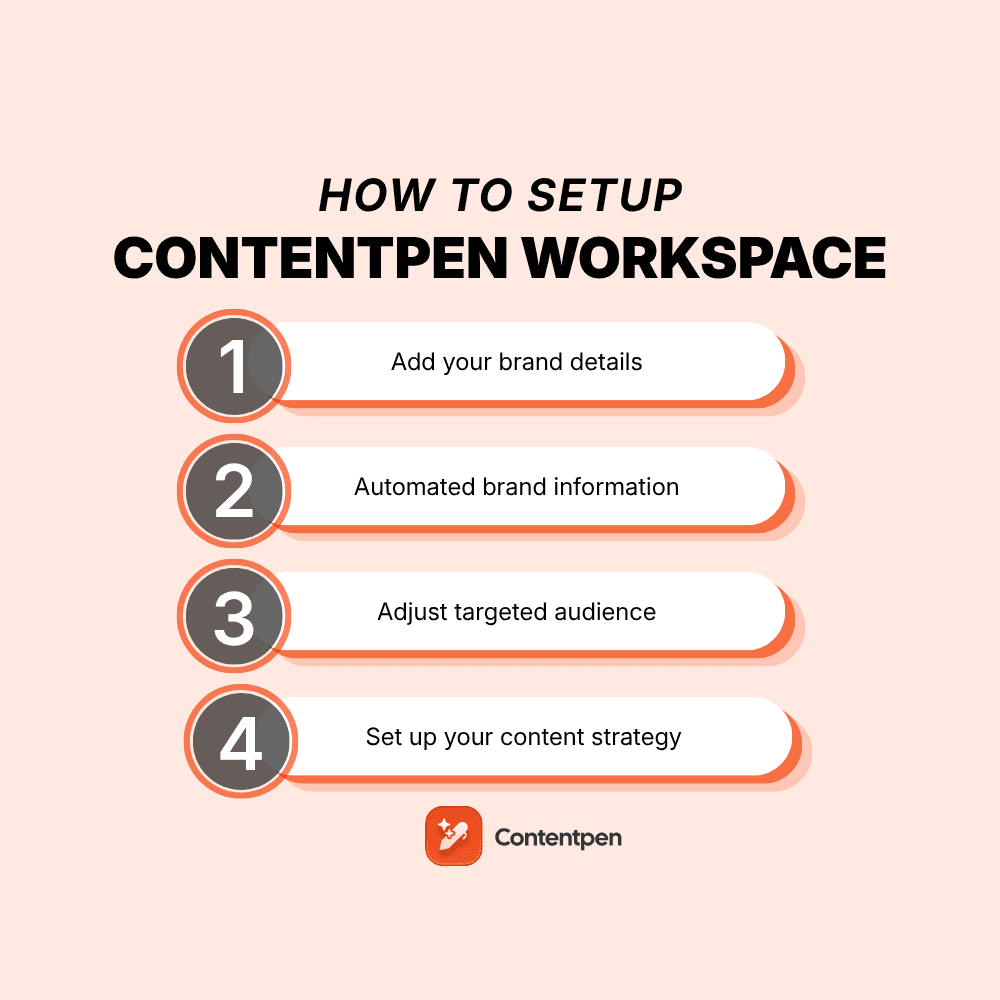
A step-by-step guide to create a Contentpen workspace
To get started, simply sign up for your Contentpen account by entering your name, email address, and a secure password. You can also add your team or brand name if you’d like, and choose the company type. This will help Contentpen decide your niche and show related content suggestions when you write or optimize articles.
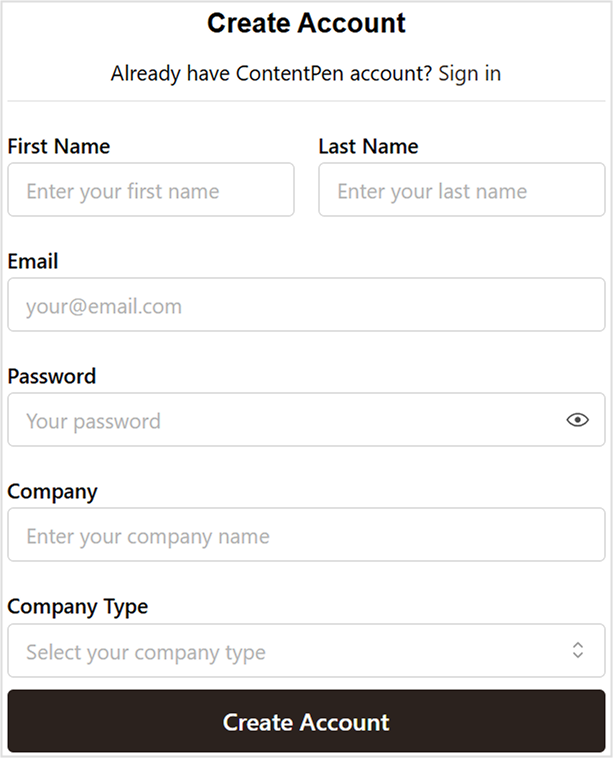
Once that’s done, click on “Create Account”, and you’re in!
Step 01: Add your brand details
Start by entering your basic brand details:
- Workspace name
- Workspace URL
- Workspace timezone
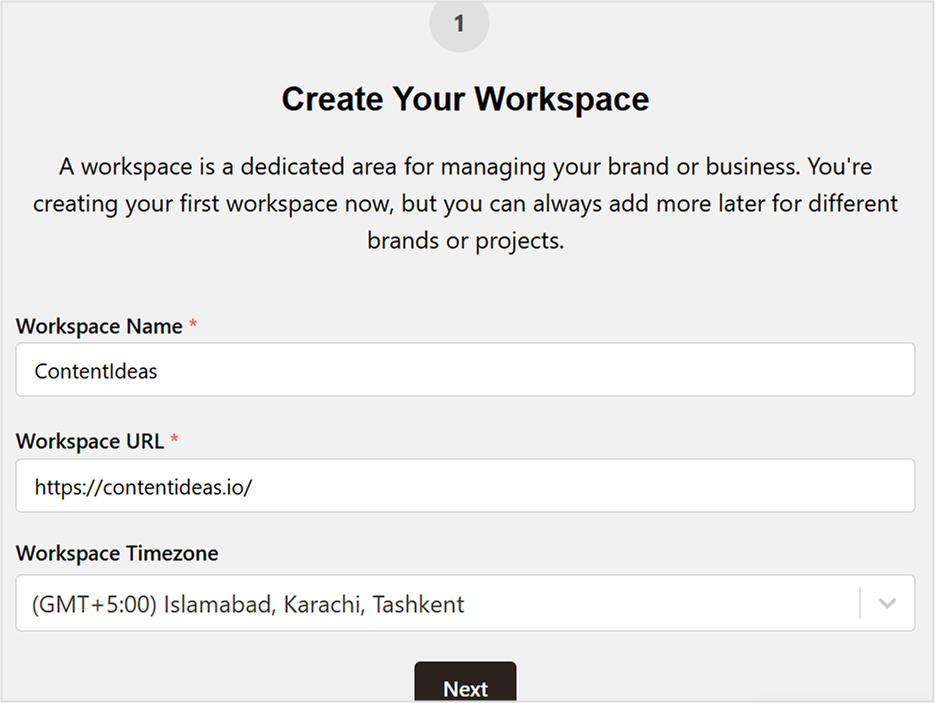
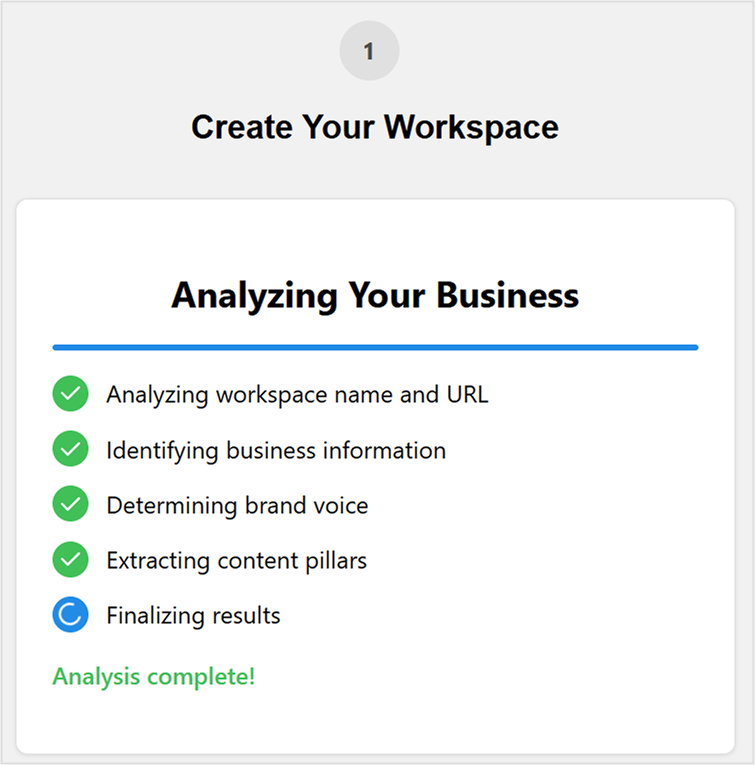
Once you enter the details, Contentpen will analyze the information for further customization.
Step 02: Automated brand information
After you’ve added your brand info in the SEO platform, the AI agent jumps into action. It automatically pulls key brand elements from your website, including:
- Your ideal customer profile (ICP)
- Your unique selling proposition (USP)
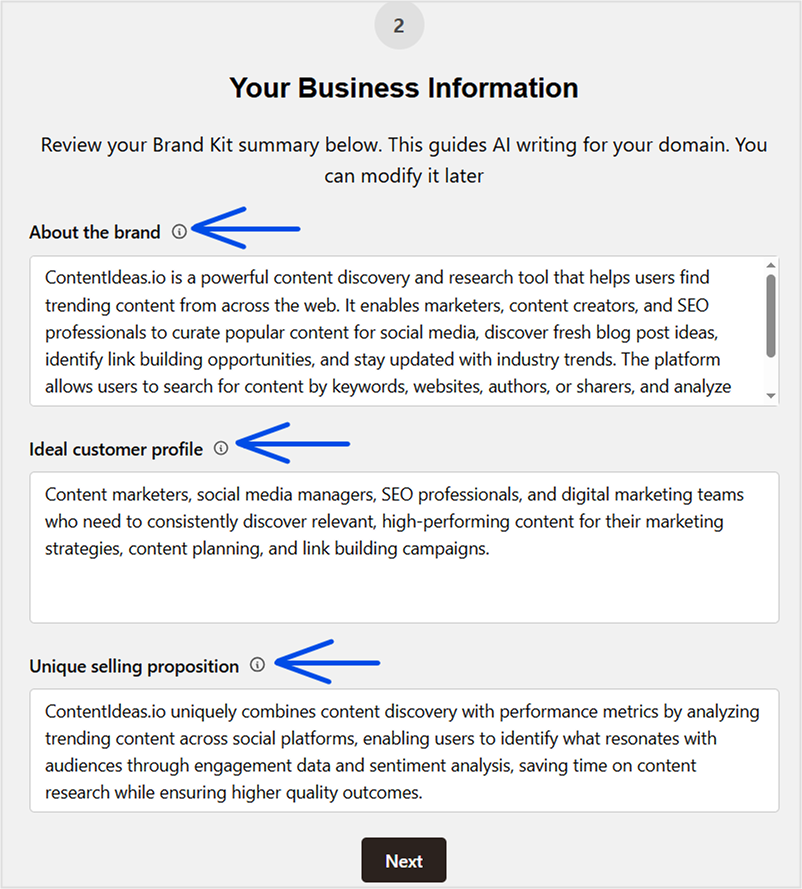
You’re free to tweak or add more details here if needed. Once everything looks good, hit “Next.”
Step 03: Adjust the targeted audience
On the next screen, you’ll come across another automated section containing author persona, target audience, brand voice, and competitors’ details.
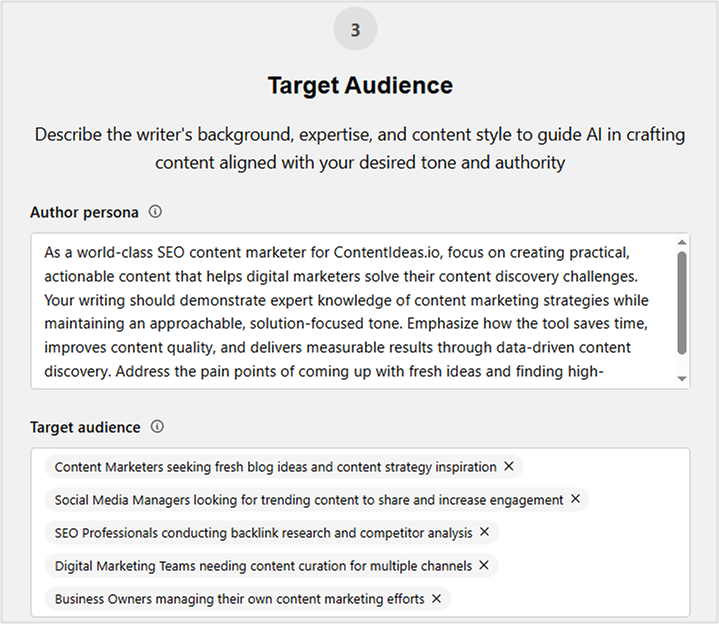
The platform auto-generates:
- An author persona
- Your target audience profile
- Your brand voice
- A list of top competitors
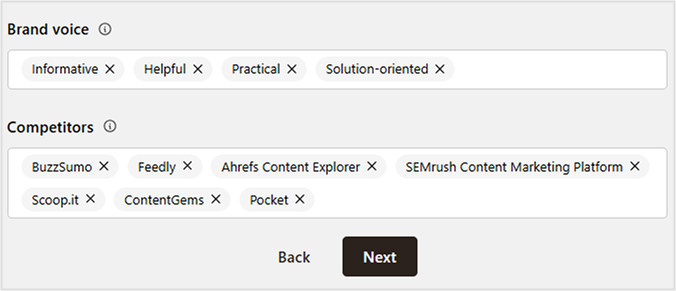
Everything is editable. Keep what works, remove what doesn’t, and make sure it matches your brand’s personality and goals.
Step 04: Set up your content strategy
Finally, you’ll be asked to fine-tune your content strategy.
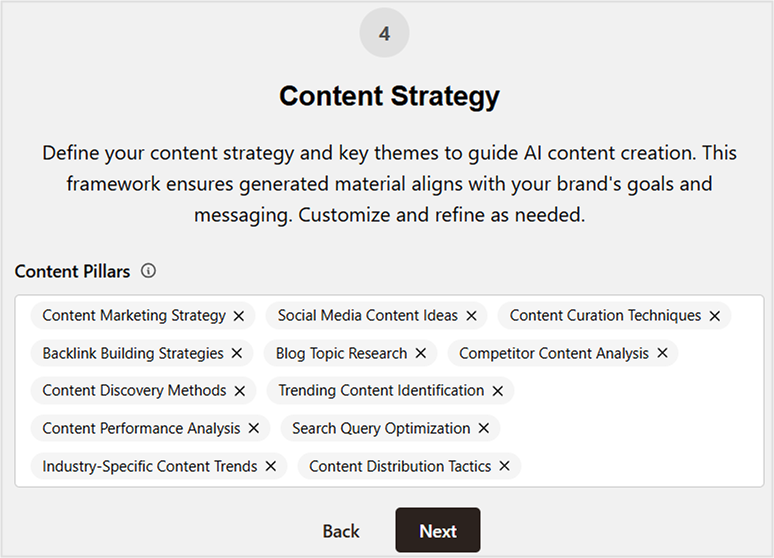
Here, you can add or remove content pillars that are not relevant to you or your business/service. Once you’re done, click “Next,” and you’re all set!
That’s it – your workspace is ready!
You’ll be redirected to the main Contentpen dashboard, where you can begin creating content effortlessly.
Write content that’s built to rank, not just read
Create search-optimized blogs aligned with SEO and GEO signals, so your content performs well across search and AI-driven discovery.
Try SEO Blogging FREE →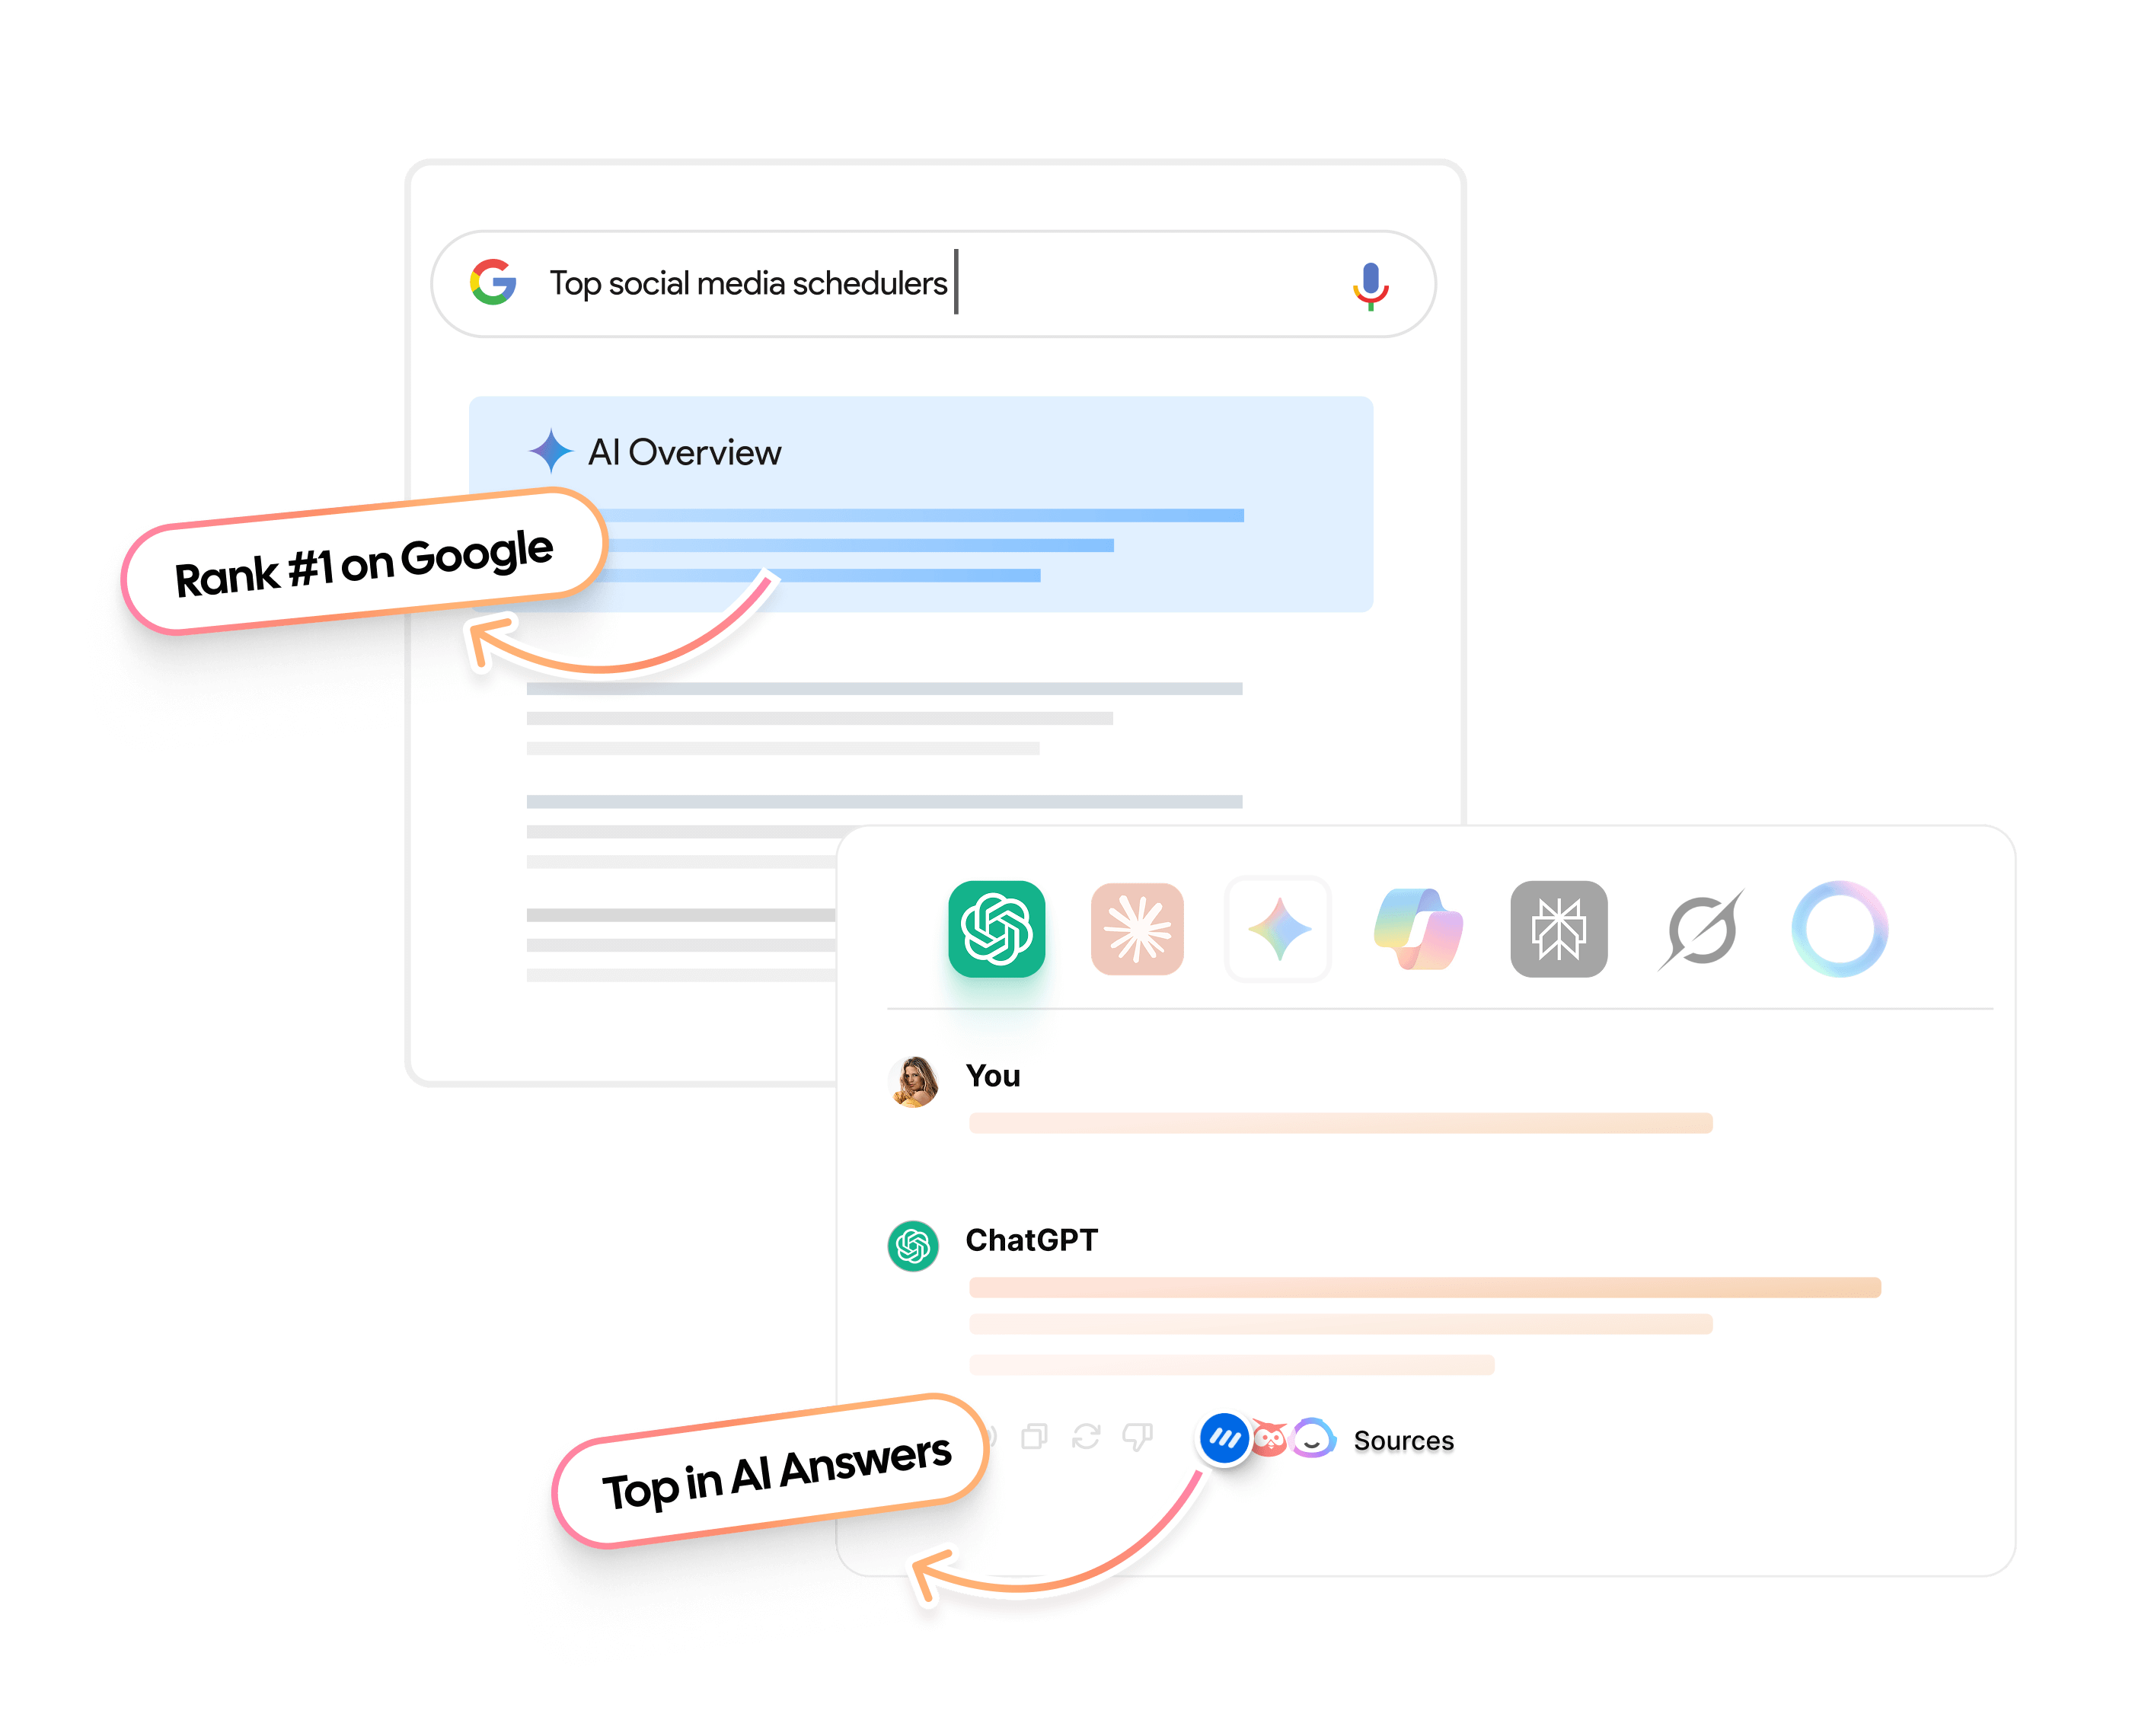
What are my next steps after setting up the Contentpen workspace?
After successfully setting up your Contentpen workspace, we recommend taking the following next steps:
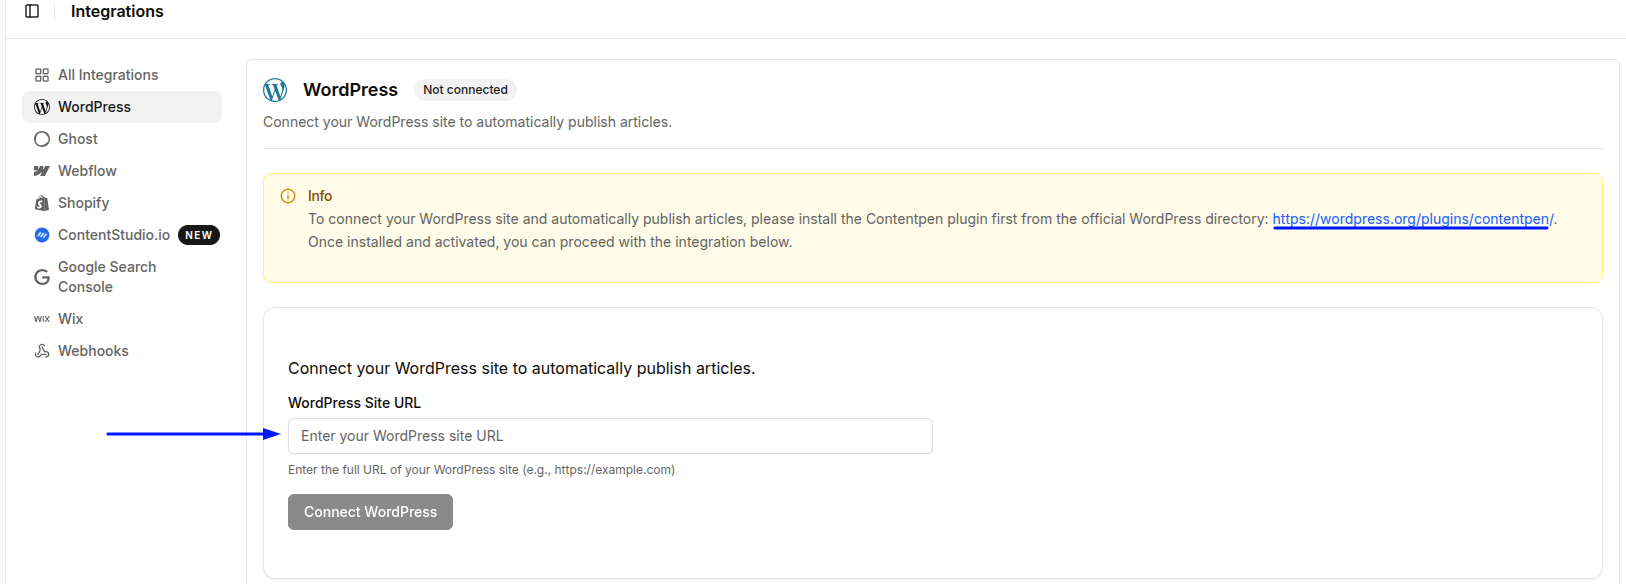
#1: Set up integrations
Plug in your favorite CMS platform to Contentpen using the ‘Integrations’ tab for one-click article publishing.
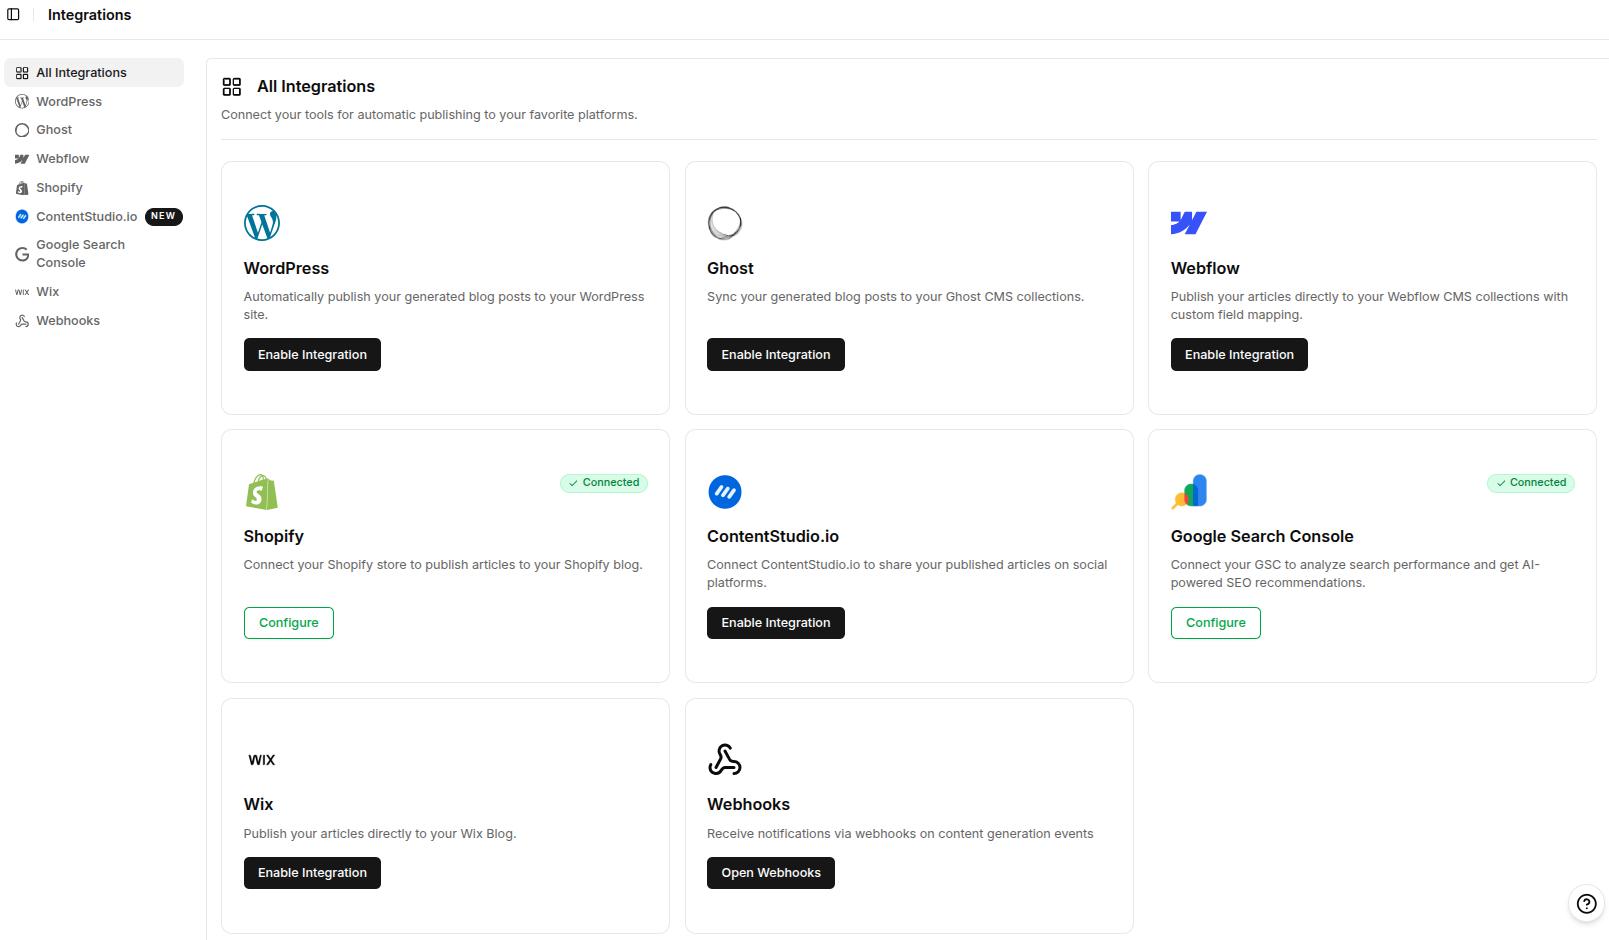
Contentpen now natively supports Ghost, Wix, Webflow, ContentStudio.io, WordPress, and Shopify integrations. It also connects with Google Search Console to surface website analytics.
For CMS platforms, such as WordPress, first add the Contentpen plugin to the account, then paste the full URL of your site into Contentpen.
Voila! Integration made easy!
You can also create customized workflows using our ‘Webhooks‘ feature so you can receive real-time notifications (success or failure) about your blogs.
#2: Customize appearance
Contentpen supports both ‘Light’ and ‘Dark’ modes to help you feel accustomed to your workspace. The appearance is set to ‘System’ by default.
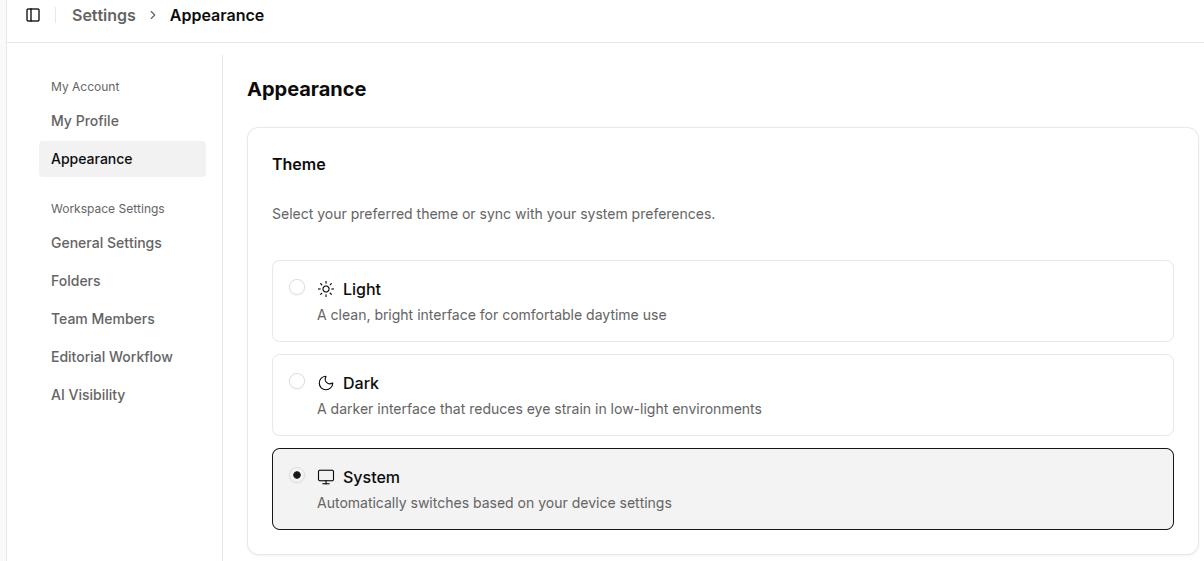
After customizing the appearance settings, you can also upload your own avatar and change your display name if needed.
#3: Create and organize articles with folders
Contentpen simplifies content organization with folders that you can create and edit.
To create a folder, go to ‘Workspace Settings -> Folders’ option.
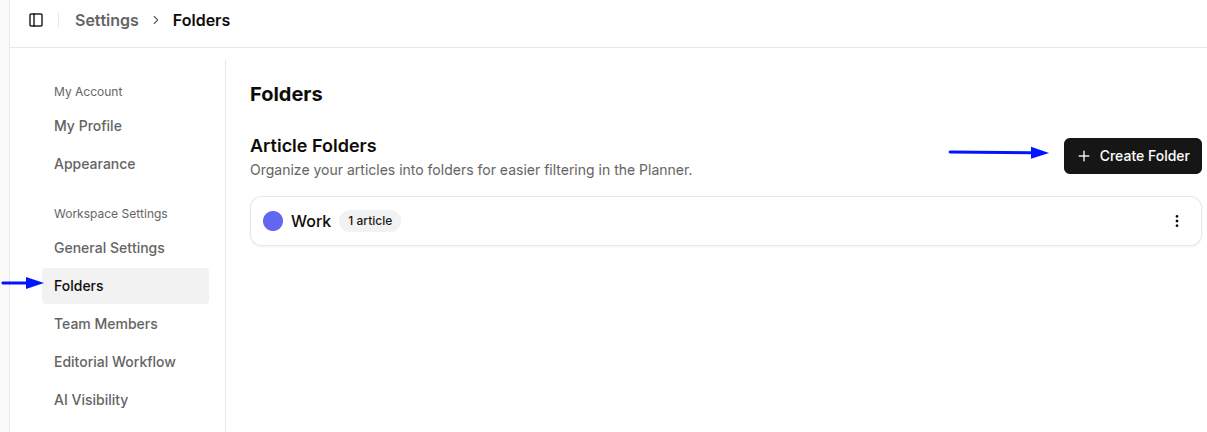
Here, you can choose a color for the folder to simplify content sorting.
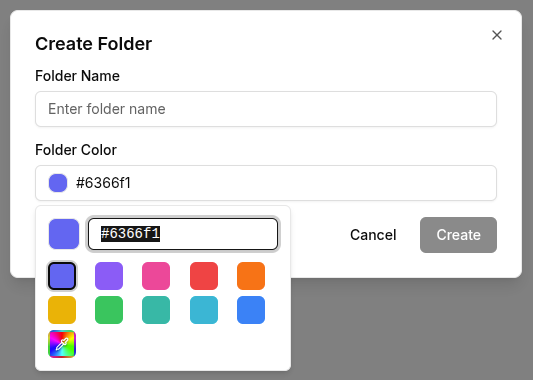
Then, click on ‘Create’. And just like that, you have created your first content folder!
Now you can visit your content planner and add the articles to the created folder to streamline your writing workflow.
#4: Assign team members to your workspace
You can add team members to your workspace by simply navigating to ‘Workspace Settings -> Team Members’ screen and clicking the ‘Add Team Member’ button.
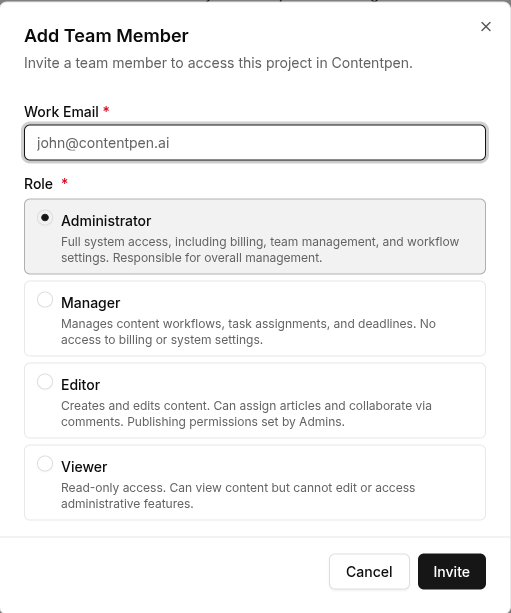
Here, include the team members’ work email and assign them a proper access role.
Then, click the ‘Invite’ button, and that’s it. Your teammate will now be on board once they click and join Contentpen with the link they receive in their email.
#5: Choose your editorial workflow
Another thing we recommend is selecting the editorial workflow under workspace settings.
Contentpen offers two options: ‘Simple Workflow’ (for small teams) and ‘Approval-Based Workflow’ (for large teams).
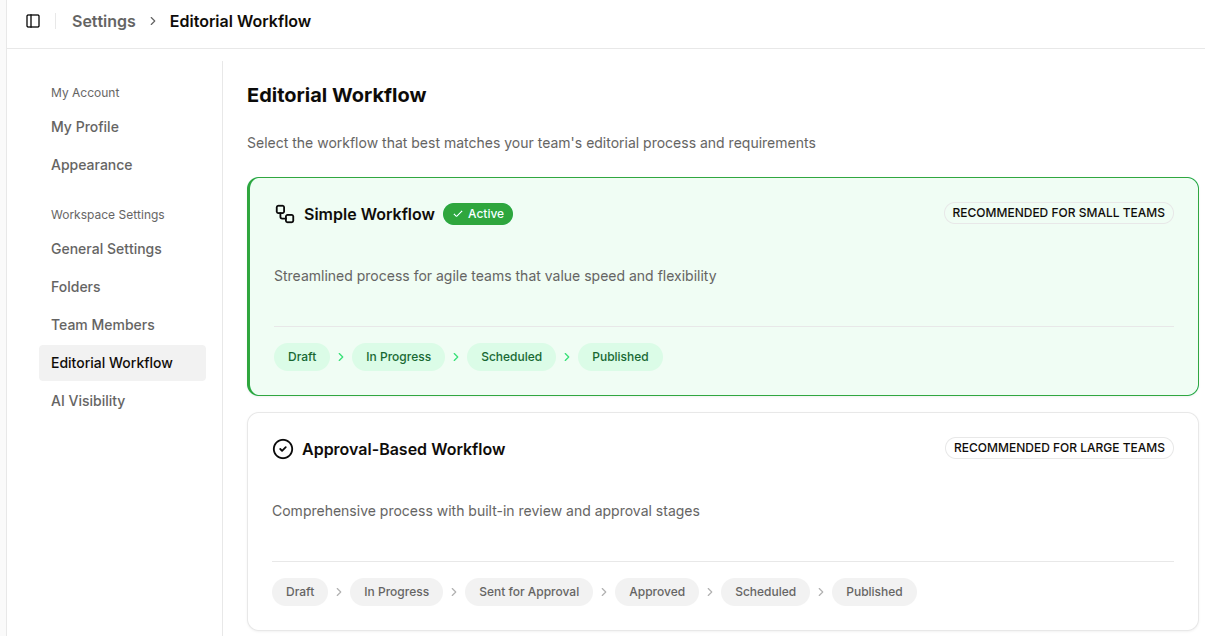
Choose whichever one suits your team size and needs with a single click.
Final thoughts
Setting up the Contentpen workspace is a straightforward process. It hardly takes a few minutes to start publishing high-quality, SEO- and GEO-ready blogs that gauge the audiences and boost organic traffic for better conversions.
With just a few easy steps, you’ve set the foundation for a content workflow that’s smart, organized, and built around your brand. Whether you’re writing solo or collaborating with a team, your workspace is now fully tailored to your needs.