Modern workflows can become redundant and repetitive. The same steps, repeated day after day, can leave you tired and unable to invest your time in crucial tasks.
This is where webhooks come into the frame.
Think of them as quiet messengers that move data between tools the moment something happens. No polling, no refresh button, no manual exports.
In today’s post, you will see webhooks explained step by step, with examples that match real-life scenarios and needs. You will also learn the basic webhook implementation and how to plug them into your own stack without writing code.
So, let’s begin, shall we?
Table of contents
- The basics of webhooks
- How webhooks work
- Webhook vs API: Understanding the key differences
- Common webhook use cases and practical applications
- How to set up and implement webhooks
- Testing and debugging webhooks with essential tools
- Securing your webhooks: Best practices for 2026
- Summing it up
- Frequently asked questions
The basics of webhooks
A good starting point for anyone asking ‘what is a webhook’ is this short answer: a webhook is an automated message one app sends to another when a specific event happens.
It delivers data in real time so the receiving tool can respond immediately. This makes webhooks perfect for real-time notifications and lightweight automation between services.
Let’s take an example of bank alerts to learn more about webhooks. You do not refresh your banking app every minute. You give the bank your phone number once, and it sends a text whenever a charge is made on the card.
A webhook behaves the same way for software.
How webhooks work
Webhooks use an HTTP callback: one app calls a special URL, and the other app exposes it whenever something important happens.
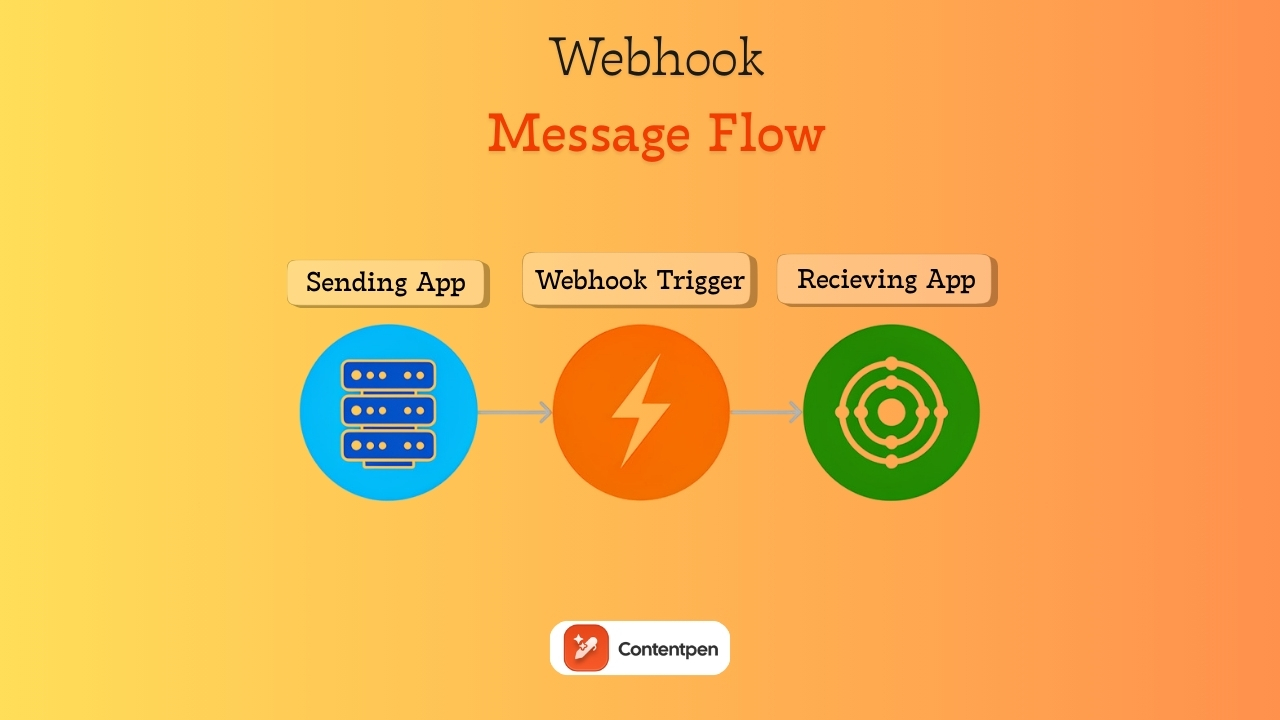
Once someone understands what a webhook is, the next step is seeing how webhooks work behind the scenes. The flow is more straightforward than it sounds.
One app notices an event, creates a bundle of data about that event, and sends it to a URL in another app. That second app receives the data and takes an action.
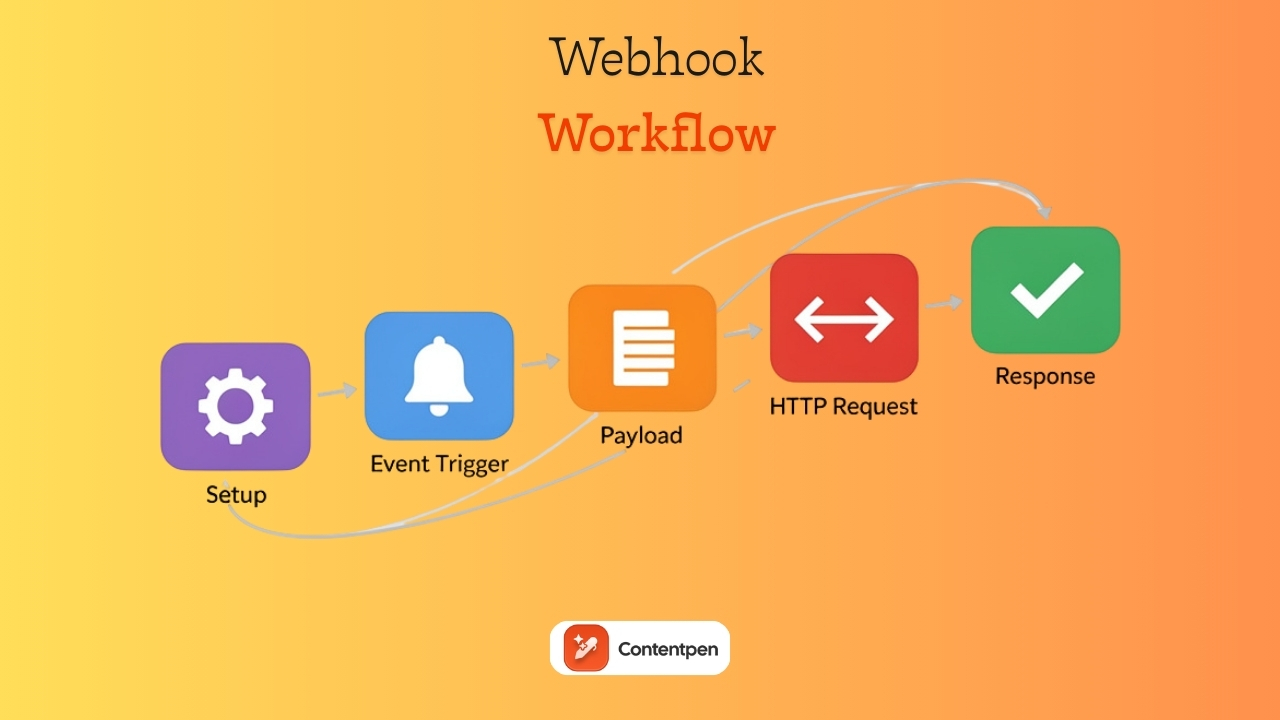
Here is a clear five-step model that applies to almost every webhook integration.
1. Setup and registration
Setup and registration begin when the receiving app provides a webhook URL. That URL is like a mailbox that accepts incoming HTTP requests.
You paste that URL into the sending app and choose which event should trigger the messages. At that point, the sender knows what to watch for and where to post data.
2. Event trigger
The event trigger is the specific action or occurrence in a source application that indicates the other application to send real-time data.
For example: A shopper places an order, a contact submits a form, or a user upgrades a subscription plan. The app checks whether this event matches the selection you made during setup. If it does, the webhook flow continues.
3. Payload generation
After the trigger, the sender gathers all essential details into a payload. The payload is usually JSON, sometimes XML, or form-encoded key-value pairs.
For example: When a sale occurs, the payload might include the order ID, customer name, items, total value, and timestamp of the purchase.
A clear structure helps any webhook API or receiving service read the data without much guesswork or effort.
4. HTTP request
Once the sender releases the payload, it makes an HTTP POST request to the webhook URL. It places the payload in the request body and may add headers for content type or security.
This request is the actual webhook call.
It is just a regular HTTP callback under the hood, which keeps the design simple and works with almost any web stack.
5. Action and response
Finally, the receiving app listens on that URL and processes each incoming request.
It parses the payload, runs through its own logic, and performs an action such as creating a record, sending a message, or updating a status.
The receiver then returns an HTTP status code indicating whether the webhook succeeded, completing the data transfer.
Webhook vs API: Understanding the key differences
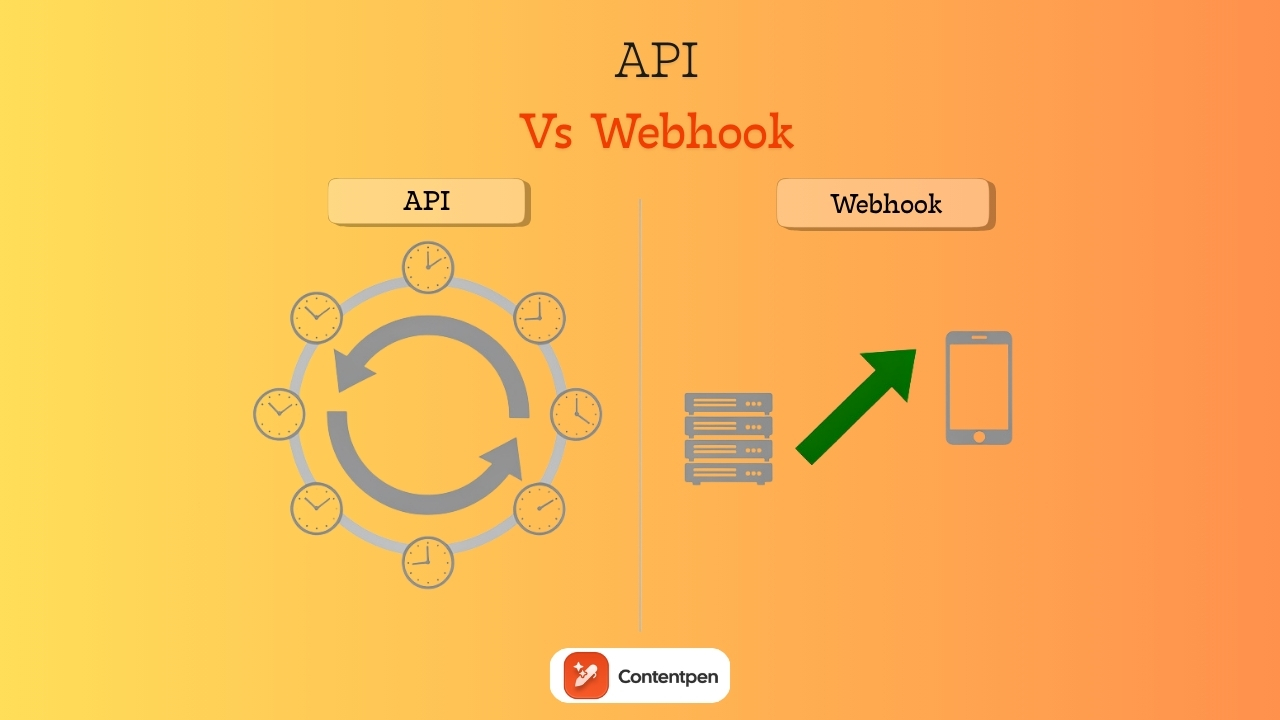
Webhooks are types of APIs, but they operate on a different communication model.
APIs are pull-based, while webhooks are push-based in theory. Both matter. They just handle different parts of the job.
An API (Application Programming Interface) is a menu of actions one app exposes so another app can request or change data.
Webhooks flip that pattern. Instead of constant polling, the server sends data only when an event occurs.
In practice, most teams use both:
- A webhook API sends a quick signal that something changed, such as a new charge or signup.
- Then the receiving app might call the main API to fetch more details or update records.
To put the webhook vs API talk briefly, use webhooks for instant responses. Use regular API calls for on-demand reads or writes initiated by your own app.
Common webhook use cases and practical applications
Webhooks act like glue that holds a tech stack together. They connect tools from separate vendors into smooth flows without heavy custom code.
For content teams, digital marketing agencies, and small businesses, specific tasks may recur, which can be easily automated with webhooks.
E-commerce and payment flows
An online store can send a webhook every time a customer places an order. The webhook can trigger actions in an accounting tool, a shipping platform, and a warehouse app, so invoices, labels, and stock updates happen automatically.
Payment providers, such as card processors, can send webhooks for successful charges, failed payments, or refunds, which then control access to digital products in membership tools.
Furthermore, teams can publish content across platforms using similar webhook-driven automation patterns.
Publish content directly to your CMS, without copy-pasting
Move from draft to live post in a single step. No hassle, no errors!
Try One-click Publishing →
Using webhooks keeps data in sync and reduces the risk of errors when batch-processing items.
Marketing and CRM coordination
When someone fills out a site form, a webhook can push their details into a CRM (customer relationship management) tool right away.
The CRM can tag the contact based on the form they used and trigger a nurture sequence within an email platform.
Similarly, ad platforms can send leads through webhooks as well, so you do not have to wait for slow exports. With strong webhook integration between lead sources and your database, salespeople can see new prospects in real time.
Team communication and alerts
Support tools can fire webhooks when a new ticket is created, a customer replies, or a case is moved to a high-priority queue.
These webhooks can post messages in Slack, Microsoft Teams, or other chat tools for instant awareness about the case.
Content systems such as WordPress can use webhooks to post in a chat channel when a new post goes live. That makes content launches more visible for editors, SEO specialists, and account managers.
Development and DevOps automation
Source code hosts can send webhooks every time someone pushes to a branch or opens a pull request.
These events can start CI or CD pipelines in tools like Jenkins or similar platforms. A commit that mentions an issue number can trigger a webhook that moves the ticket to a board, such as Jira.
On the same note, when a build fails, a webhook can open an incident task and notify the team, so fixes start right away.
Content workflow support for teams
Many content teams use an AI platform such as Contentpen for research and writing, along with a CMS, project tracker, and analytics tools.
When a draft moves from review to approved status, a webhook can perform many tasks. It can create a scheduled publish entry in the CMS, log the piece in a tracking sheet, and share a preview link in a team channel.
After a post goes live, another webhook can refresh caches or ping SEO monitoring tools to check the SEO health of the page continuously.
This pattern turns a scattered content workflow into a steady, repeatable system that keeps output moving smoothly without any hiccups.
IT operations and monitoring
Monitoring services use webhooks when a server exceeds a CPU threshold, a disk fills up, or an uptime check fails.
Automated messages via webhooks can quickly start script repairs, create tickets, and notify on-call staff, often within seconds.
These webhook examples are only a starting point. You can automate many other tasks according to your business requirements.
When you chain several webhooks and actions together, you can build powerful multi-step workflows to boost productivity.
How to set up and implement webhooks
Today, most modern tools offer a simple, no-code webhook implementation process so that users of all backgrounds can easily automate their tasks.
One SEO platform helps you set up and implement webhook integrations effortlessly for content automation.
1. Get the webhook URL from the receiving app
Start with the tool that should receive data. This might be a CRM, a project manager, or an automation platform. Open its settings and look for webhooks, integrations, API, or notifications.
For demonstration purposes, we will use the free Webhook.site platform to create a dummy webhook URL.
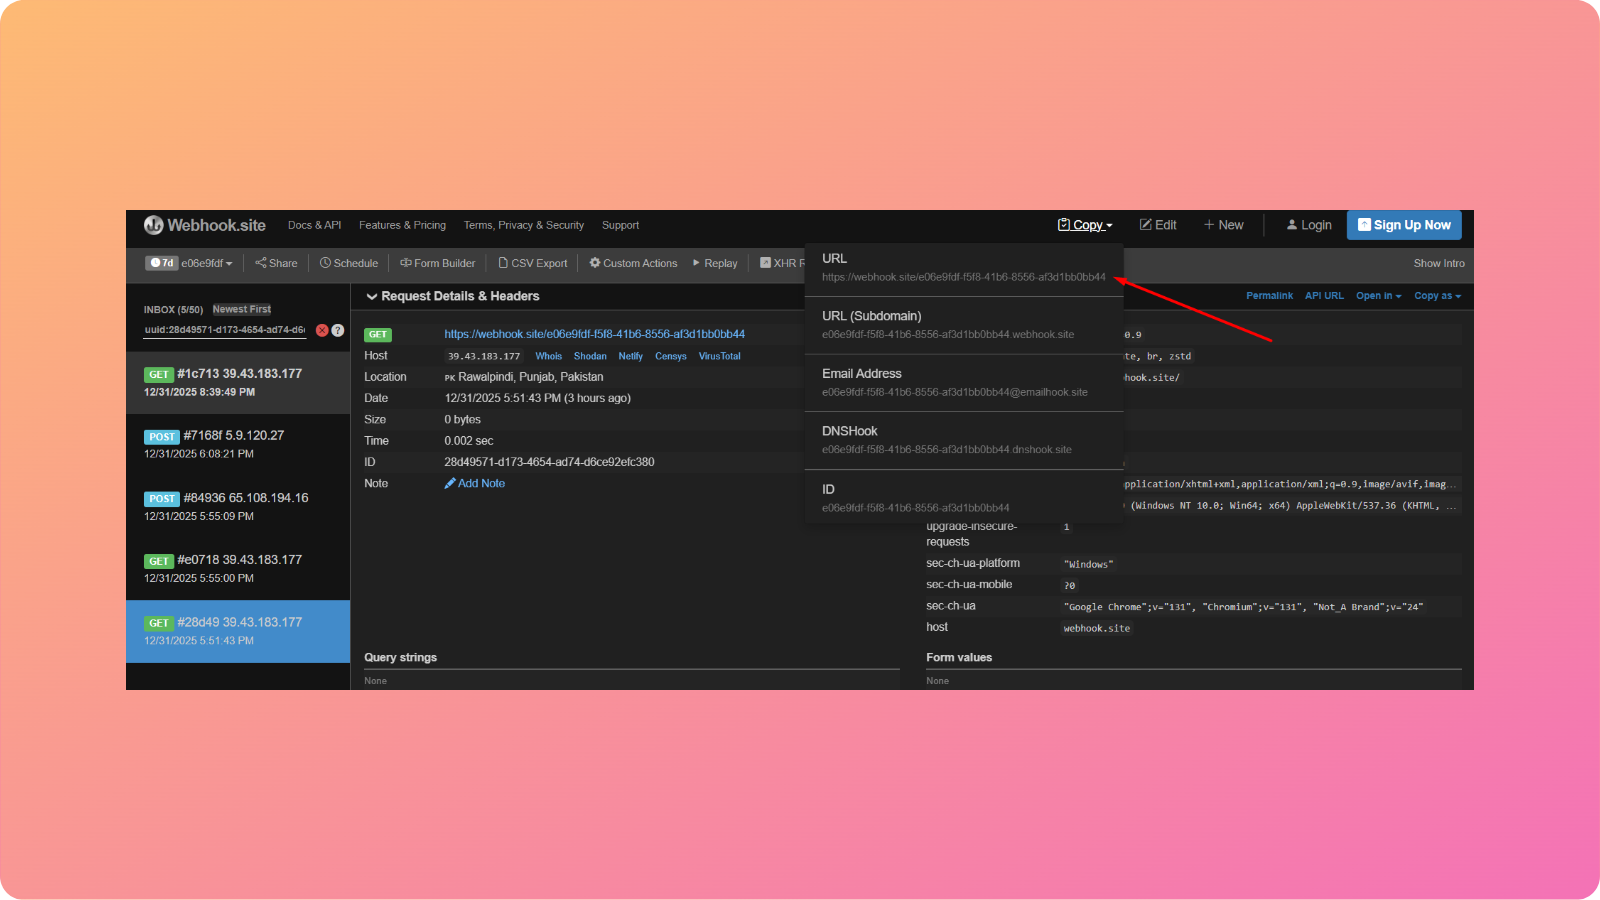
Copy this link; this is where other apps will send HTTP or HTTPS callbacks.
2. Configure the webhook in the sending app
Now move to the app where the event happens. In the case of our demonstration, this will be Contentpen.
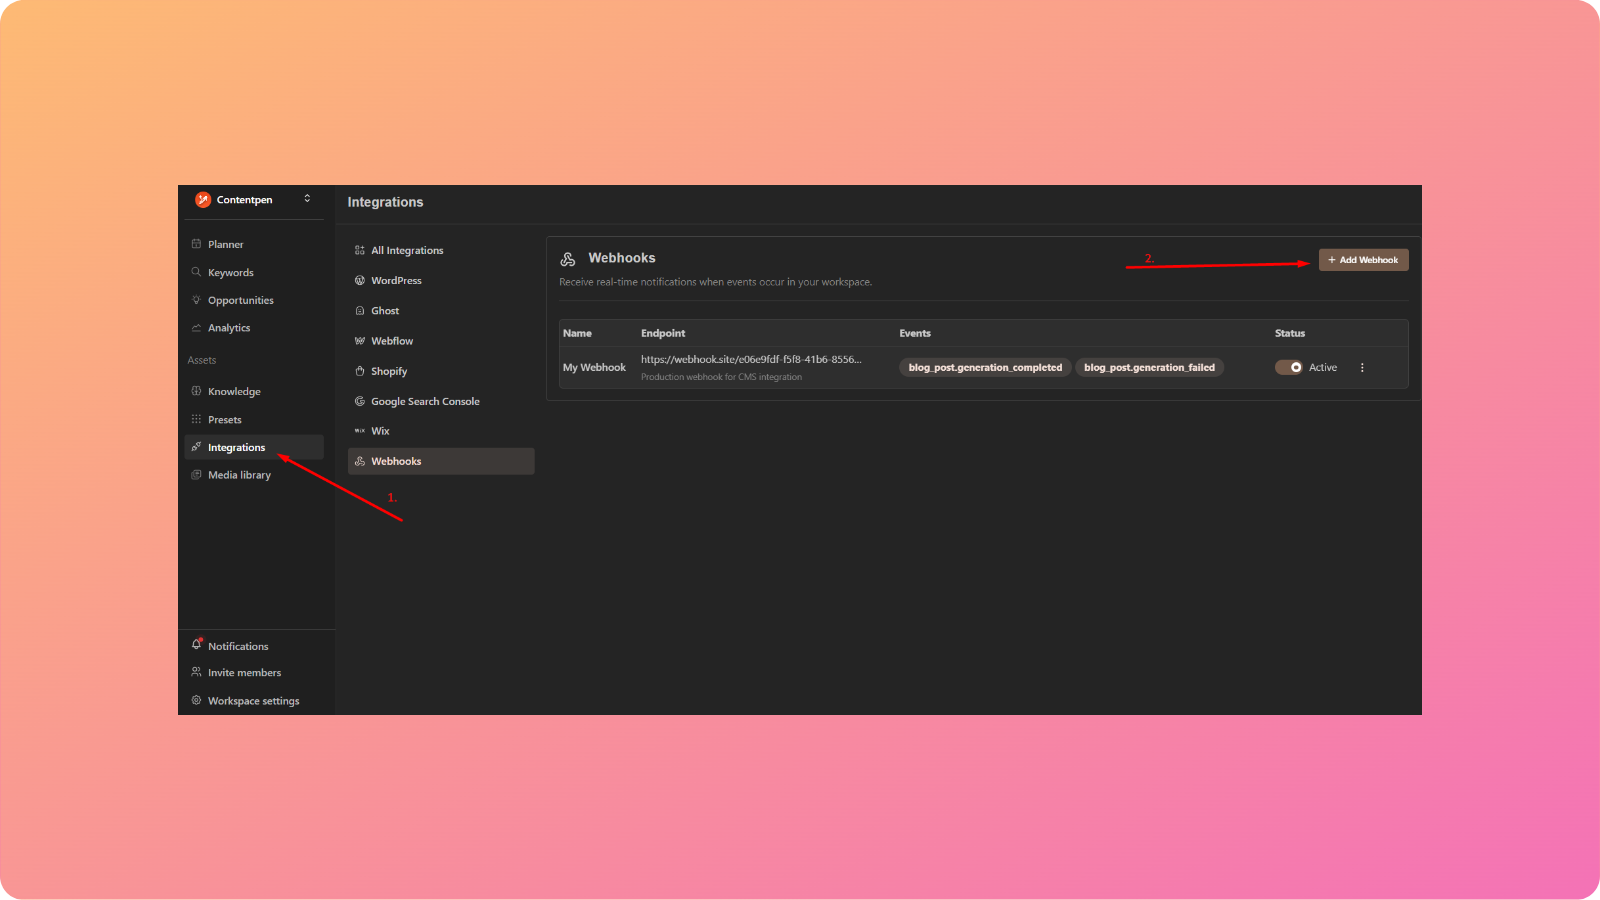
Next, go to ‘Integrations’ -> ‘Webhooks’. Click on the ‘Add Webhook’ button to create a new data push request.
Our tool provides no-code webhook integrations, allowing your team to automate content workflows without any manual intervention.
3. Specify the trigger event
Once you are done creating a new webhook instance, decide which event should start it.
You might choose from event triggers such as ‘form submitted’, ‘payment completed’, or ‘content published’, depending on your needs.
In this case, we will use the ‘blog generation completed’ and ‘blog generation failed’ as our parameters to approve the webhook data flow.
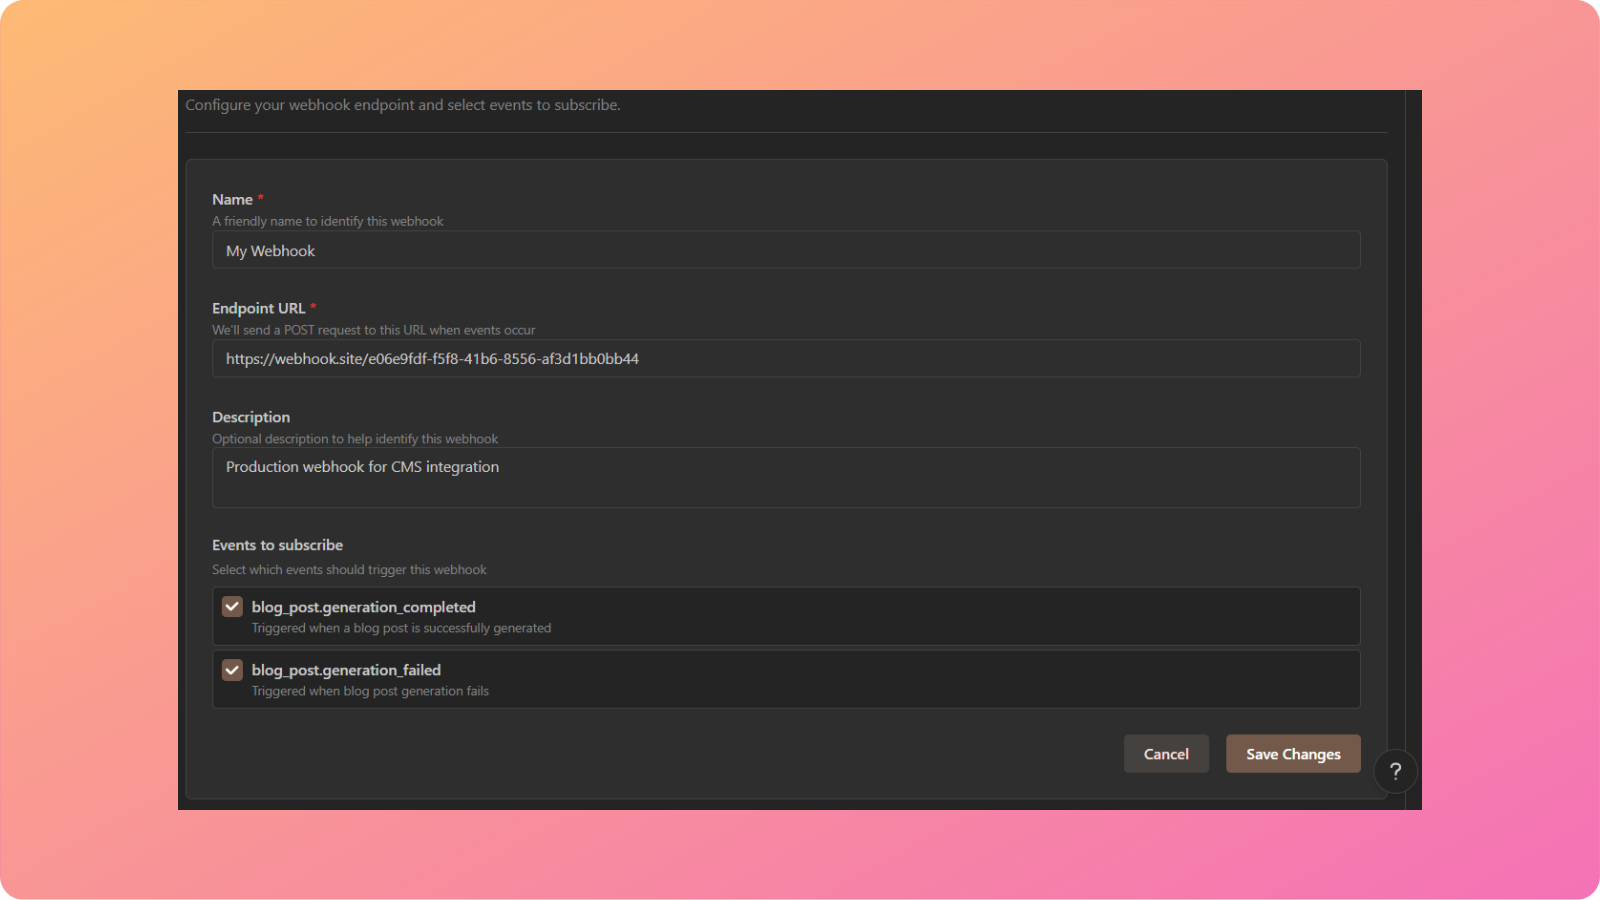
On this screen, you will name your webhook, paste the endpoint URL (from Webhook.site), and provide a suitable description.
Some apps, like Contentpen, let you select multiple events for a single webhook, while others may require a separate webhook per event.
Click on ‘Save Changes’ and move on to the next step of your basic webhook implementation.
4. Test the integration
After you set up the output data formats and other settings in the receiving app, test the webhook implementation to ensure the process completes successfully.
For this purpose, you can place a fake order, submit a test form, or move a draft through a workflow.
Then check the receiving app to see whether the new record appears with the correct values.
In our test case, we opened Webhook.site to see the results of posting a dummy blog on Contentpen.

From the screenshot, you can see that the webhook is working successfully.
With this new webhook, we will receive a blog’s data, including the author name, title, and content, whenever it is generated in Contentpen.
Similarly, if a blog isn’t created, we will receive a message here with all the details of why the process didn’t proceed as expected.
Testing and debugging webhooks with essential tools
Even with careful setup, the first webhook call does not always work as planned. That is normal.
Debugging webhooks feels less scary once you have a simple process and the right tools. Two of the most helpful tools in this regard are RequestBin and Postman, along with the free built-in logs many apps offer.
Debugging webhooks with RequestBin
RequestBin helps you see precisely what a sending app is posting. You create a temporary URL on the website and paste it into the sending app instead of your actual destination.
Next, you trigger your event, such as a form fill or test sale. When you refresh RequestBin, you will see the full HTTP request, including headers and the payload body.
This makes it easy to spot missing fields, incorrect formats, or headers that your target app expects.
Testing webhooks with Postman
Postman works from the other side of the webhook data chain. You use it to act like the sending app and call your real webhook endpoint by hand.
In Postman, you create a POST request, paste your destination webhook URL, and enter a JSON payload that looks like what the source app should send.
When you hit send, you can watch the response and confirm that the receiving app processes the request correctly. If any problems persist, then they must be on the sending side, not the receiver.
Utilizing webhook delivery logs to check webhooks
In addition to RequestBin and Postman, you can also lean on webhook delivery logs that many platforms include by default. They show a list of recent calls with timestamps, status codes, and error messages.
For instance: A delivery log may show a status code of 200, indicating success, while codes in the 400 or 500 range indicate issues.
If you see repeated retries or long delays in the log, that can point to timeouts or rate limits. Later, you can fix these issues at either the sending or receiving end.
Securing your webhooks: Best practices for 2026

A webhook URL is a public endpoint, which means anyone who has it can try to send data there.
Strong security measures can keep fake or tampered requests from triggering actions in your systems, avoiding unwanted chaos.
Threats may come in a few ways:
- An attacker might try to guess your webhook URL and send bogus data that looks real enough to pass.
- Someone might capture a valid request and replay it later, causing a single event to run twice.
- Others might flood an endpoint with calls to slow or crash it.
The good news is that you can reduce these risks with a few layers of defense.
Always protect data in webhook transit with HTTPS
A webhook that uses HTTPS keeps payload data encrypted as it traverses networks. This is the reason why our demonstration also used an HTTPS request rather than plain HTTP.
On top of this, you can use certificates issued by a trusted authority and renew them on time, so calls do not fail due to expired security certificates.
Verify payload senders with shared secrets and HMAC signatures
Many webhook providers let you set a secret value known only to the sender and receiver. When the sender posts a payload, it also calculates an HMAC signature based on the payload and the secret.
The receiver uses the same secret key to compute its own version and compares the two values. If they match, the request is validated, and it is ensured that the body has not been changed in transit.
Check timestamps to block replay attempts
A simple time check adds another layer. The sender includes a timestamp that marks when it created the webhook. The receiver compares that time to the current time and rejects any request that looks too old (like older than a few minutes).
When you combine the timestamp with an HMAC signature, attackers cannot change the time without breaking the signature.
Add tokens, IP checks, and stronger options where needed
Some apps allow static tokens or API keys passed in headers, which the receiver can validate before doing any work.
Firewalls or reverse proxies can limit inbound traffic to the list of IP ranges a sender publishes.
High security setups can even use mutual TLS, where both sides present certificates and verify each other before any webhook data flows.
Stacking these options together creates a deeper defense and makes casual attacks much harder.
Summing it up
A webhook is an automated HTTP or HTTPS callback that passes event data from one app to another in real time.
Instead of people shuffling data between tools, webhooks move it quickly and reliably, reducing manual effort.
In this post, we saw how webhooks work, their everyday use cases, and how to set up and implement them in real-life scenarios.
A good next step is to identify one painful task in your current workflow and set up a small webhook integration to immediately boost productivity for your teams.