Connecting your WordPress site to Contentpen is quick and easy. This integration allows you to seamlessly manage, schedule, and publish content from Contentpen directly to your WP dashboard without any manual work.
With just a few clicks, you can connect your site, install the Contentpen plugin, and start pushing content live, all from one place.
So, let’s get started.
Table of contents
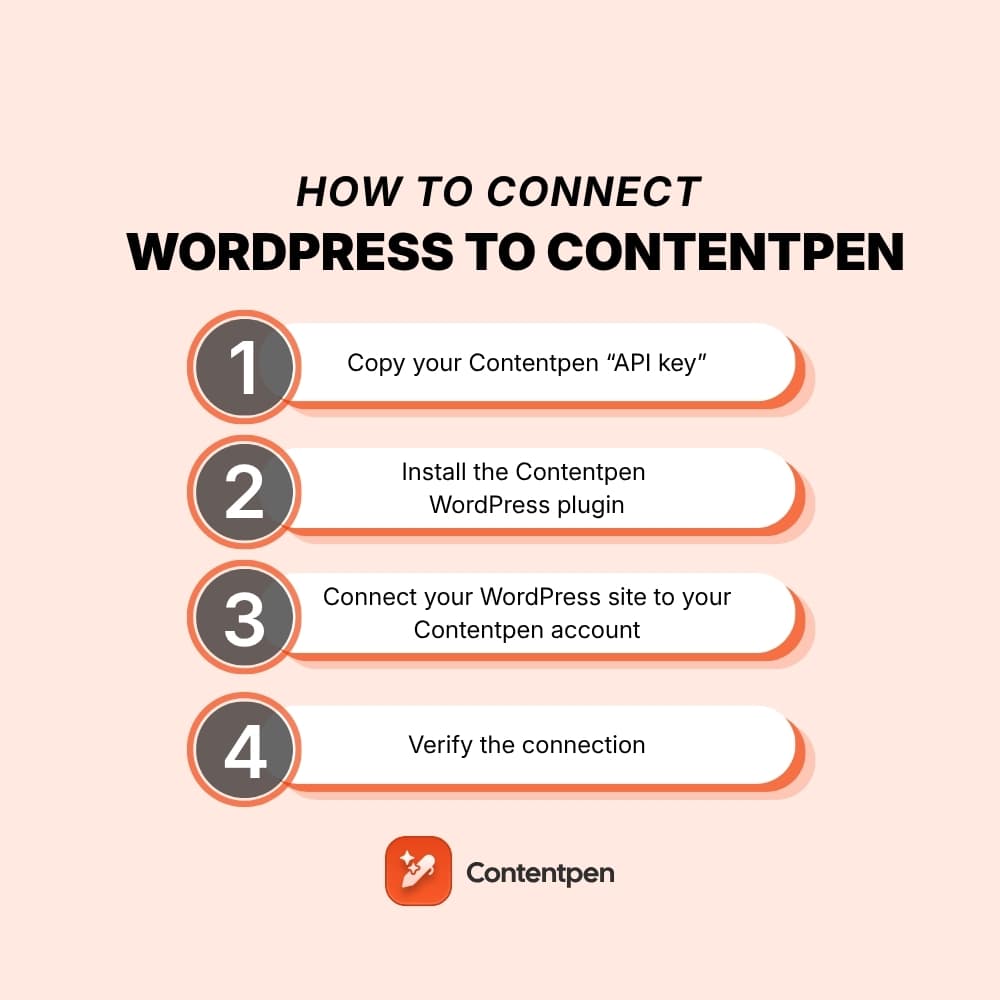
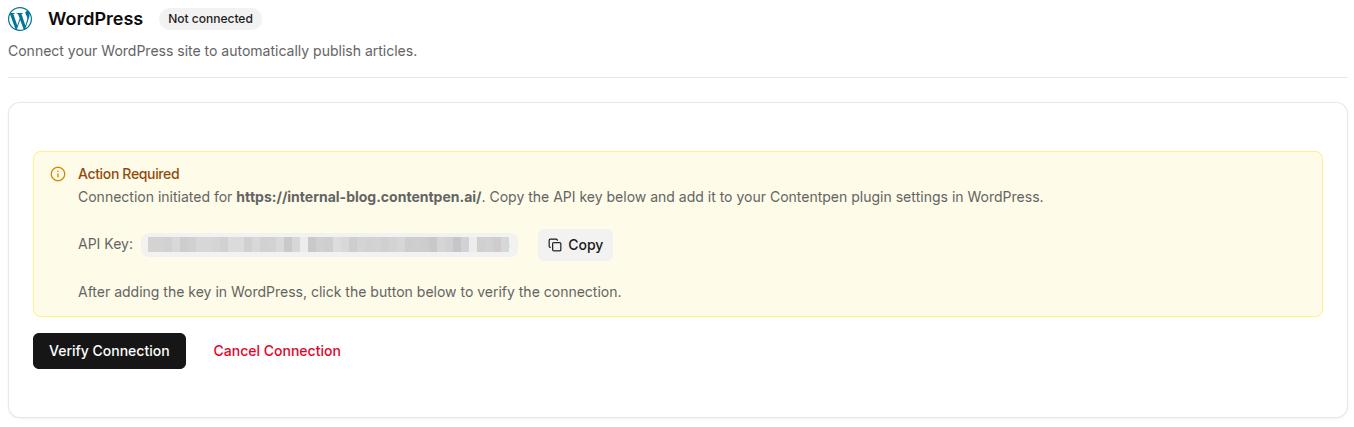
Step 01: Copy your Contentpen “API key”
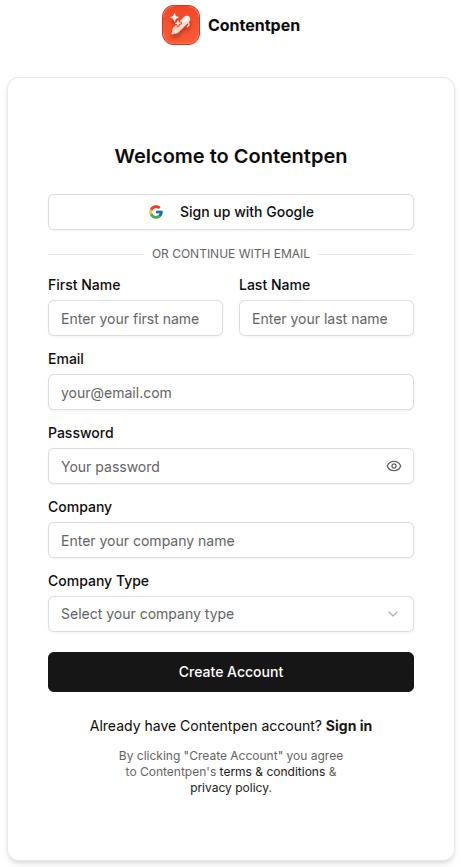
- Start by logging into your Contentpen account. If you don’t have one yet, sign up at Contentpen.
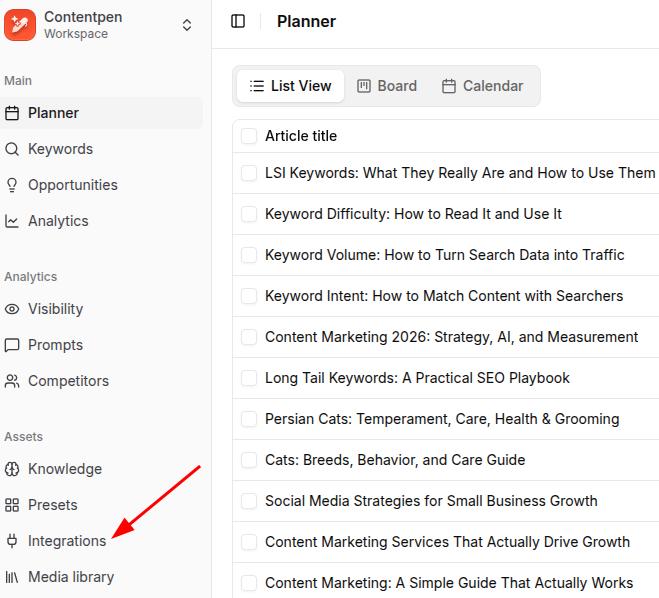
- Go to the “Integration” tab in the left menu.
- Enter your WordPress site URL and click “Connect WordPress.”

- Then, copy the API Key that appears.
Once you’ve copied your API key, it’s time to install the Contentpen WordPress plugin.
Step 02: Install the Contentpen WordPress plugin
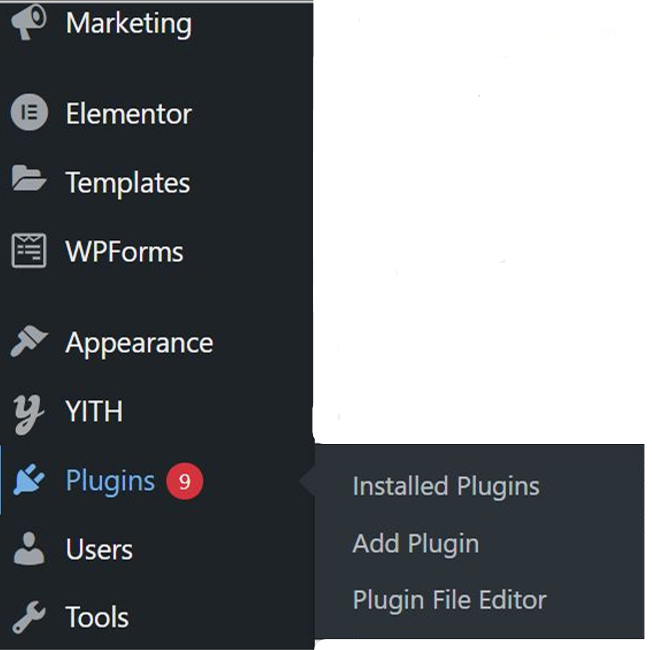
- Log in to your WordPress admin panel. In the left-hand sidebar menu, hover over “Plugins” and then click “Add Plugin.”
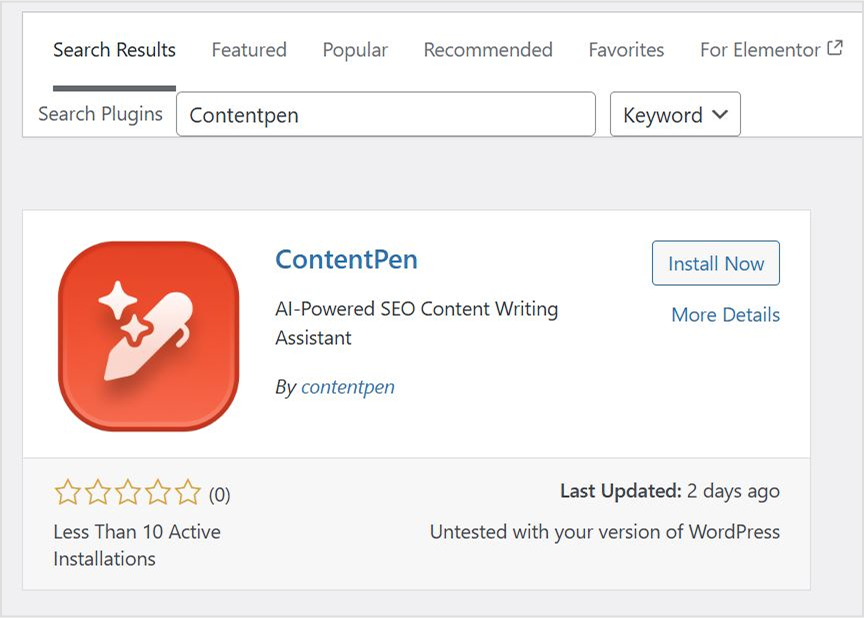
- In the search bar at the top right, type “Contentpen.” You should see the official Contentpen plugin in the search results. Look for a plugin with the Contentpen logo and a description.
- Once you’ve found the correct plugin, click the “Install Now” button next to it.
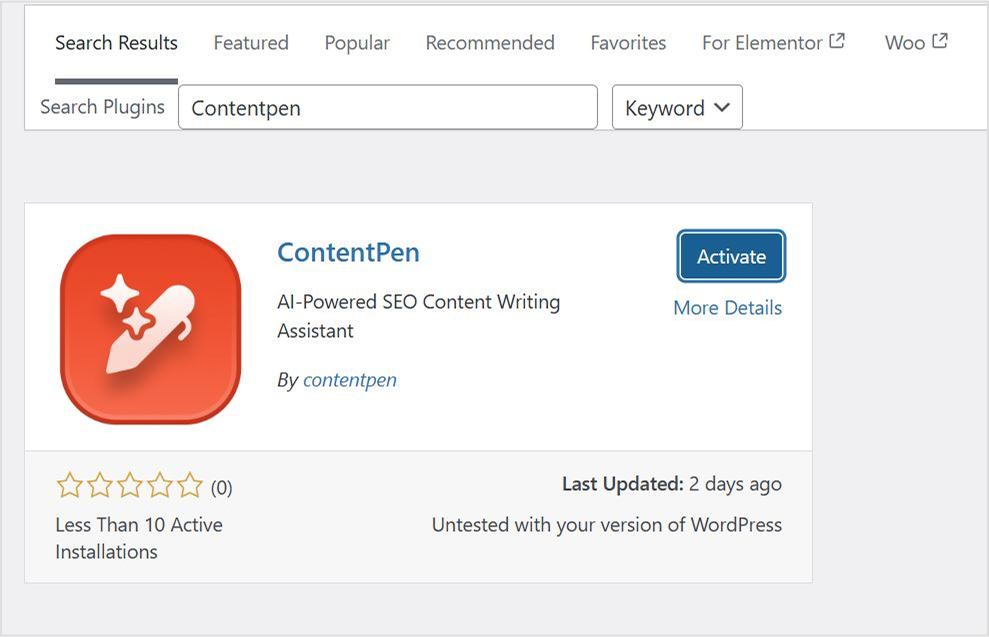
- After the plugin has been installed, the “Install Now” button will change to “Activate.” Click “Activate” to enable the plugin on your WordPress site.
Step 03: Connect your WordPress site to your Contentpen account
Once the plugin is activated, connect it to your Contentpen account.
- Now, you need to find the Contentpen settings. After activation, a new menu item for “Contentpen” might appear in your WordPress sidebar.
- Go into the ‘Contentpen’ settings and paste the API key you copied earlier to link your WordPress site.
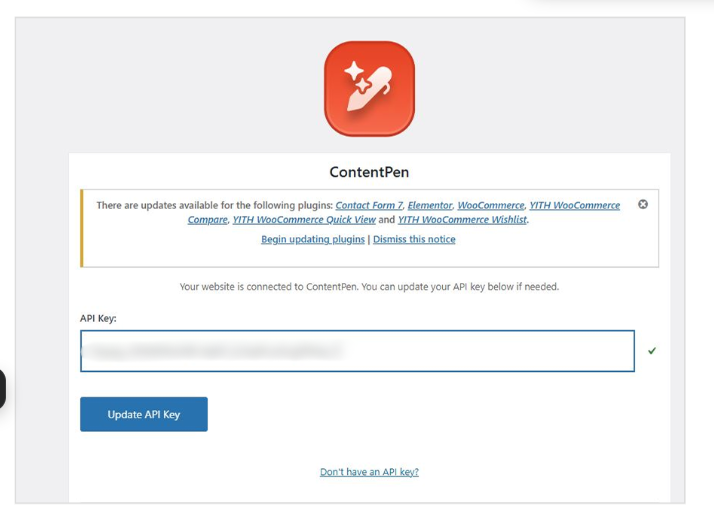
- Save or update the settings to confirm the connection between Contentpen and your WP account.
Step 04: Verify the connection from WordPress
Once you’ve connected WordPress to the AI writing tool, it is time to verify the connection from Contentpen.
- Click on the ‘Verify Connection’ button in the WordPress integrations tab and wait for a while.
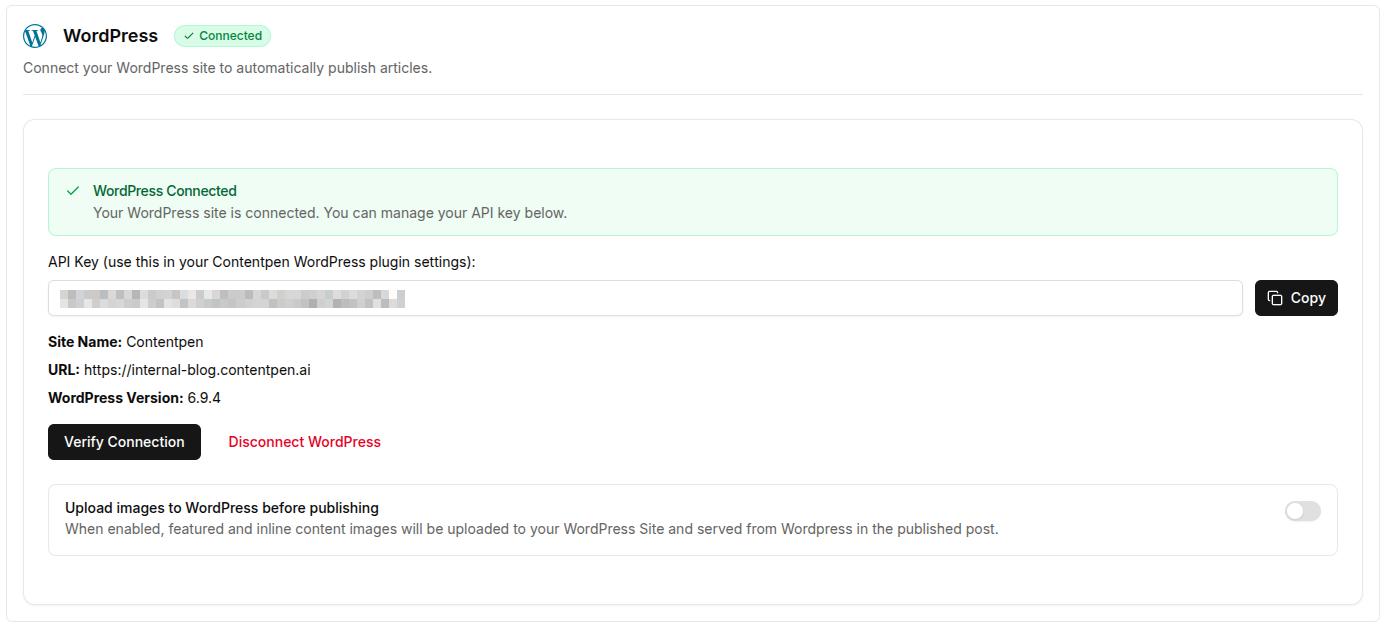
- You will get a notification pop-up confirming that you have a successful connection with WordPress.
You can also upload images that Contentpen generates directly to WordPress by using the slider at the bottom of the WP integration page.
How to publish a blog directly from Contentpen to WordPress
Let’s say you’ve just finalized a blog post draft in Contentpen. Instead of downloading and manually uploading it into WordPress, you can now:
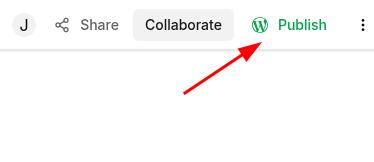
Step 01: Click on the content piece you want to publish.
Step 02: Hit the “Publish” button in the top right corner.
Step 03: A pop-up will appear, allowing you to choose an author, assign categories, and add relevant tags for the post. You can also choose to send the content to your WP as a draft instead of publishing it directly.
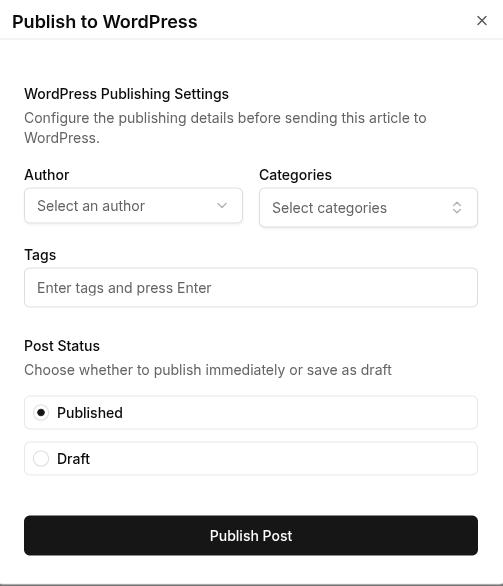
Step 04: When you’re ready, hit the “Publish Post” button, and your blog will go live on your website instantly.

Final thoughts
You’re all set! With Contentpen connected to WordPress, you can schedule, manage, and publish content without ever leaving the platform.
From here, you might want to explore scheduling posts in advance, enabling image uploads, or creating content directly from the AI writing assistant app.
Remember to keep the plugin updated to stay compatible with new features as they roll out. Also, check out Contentpen blogs for more information about the tool and see how you can utilize it to write SEO-optimized content with convenience.
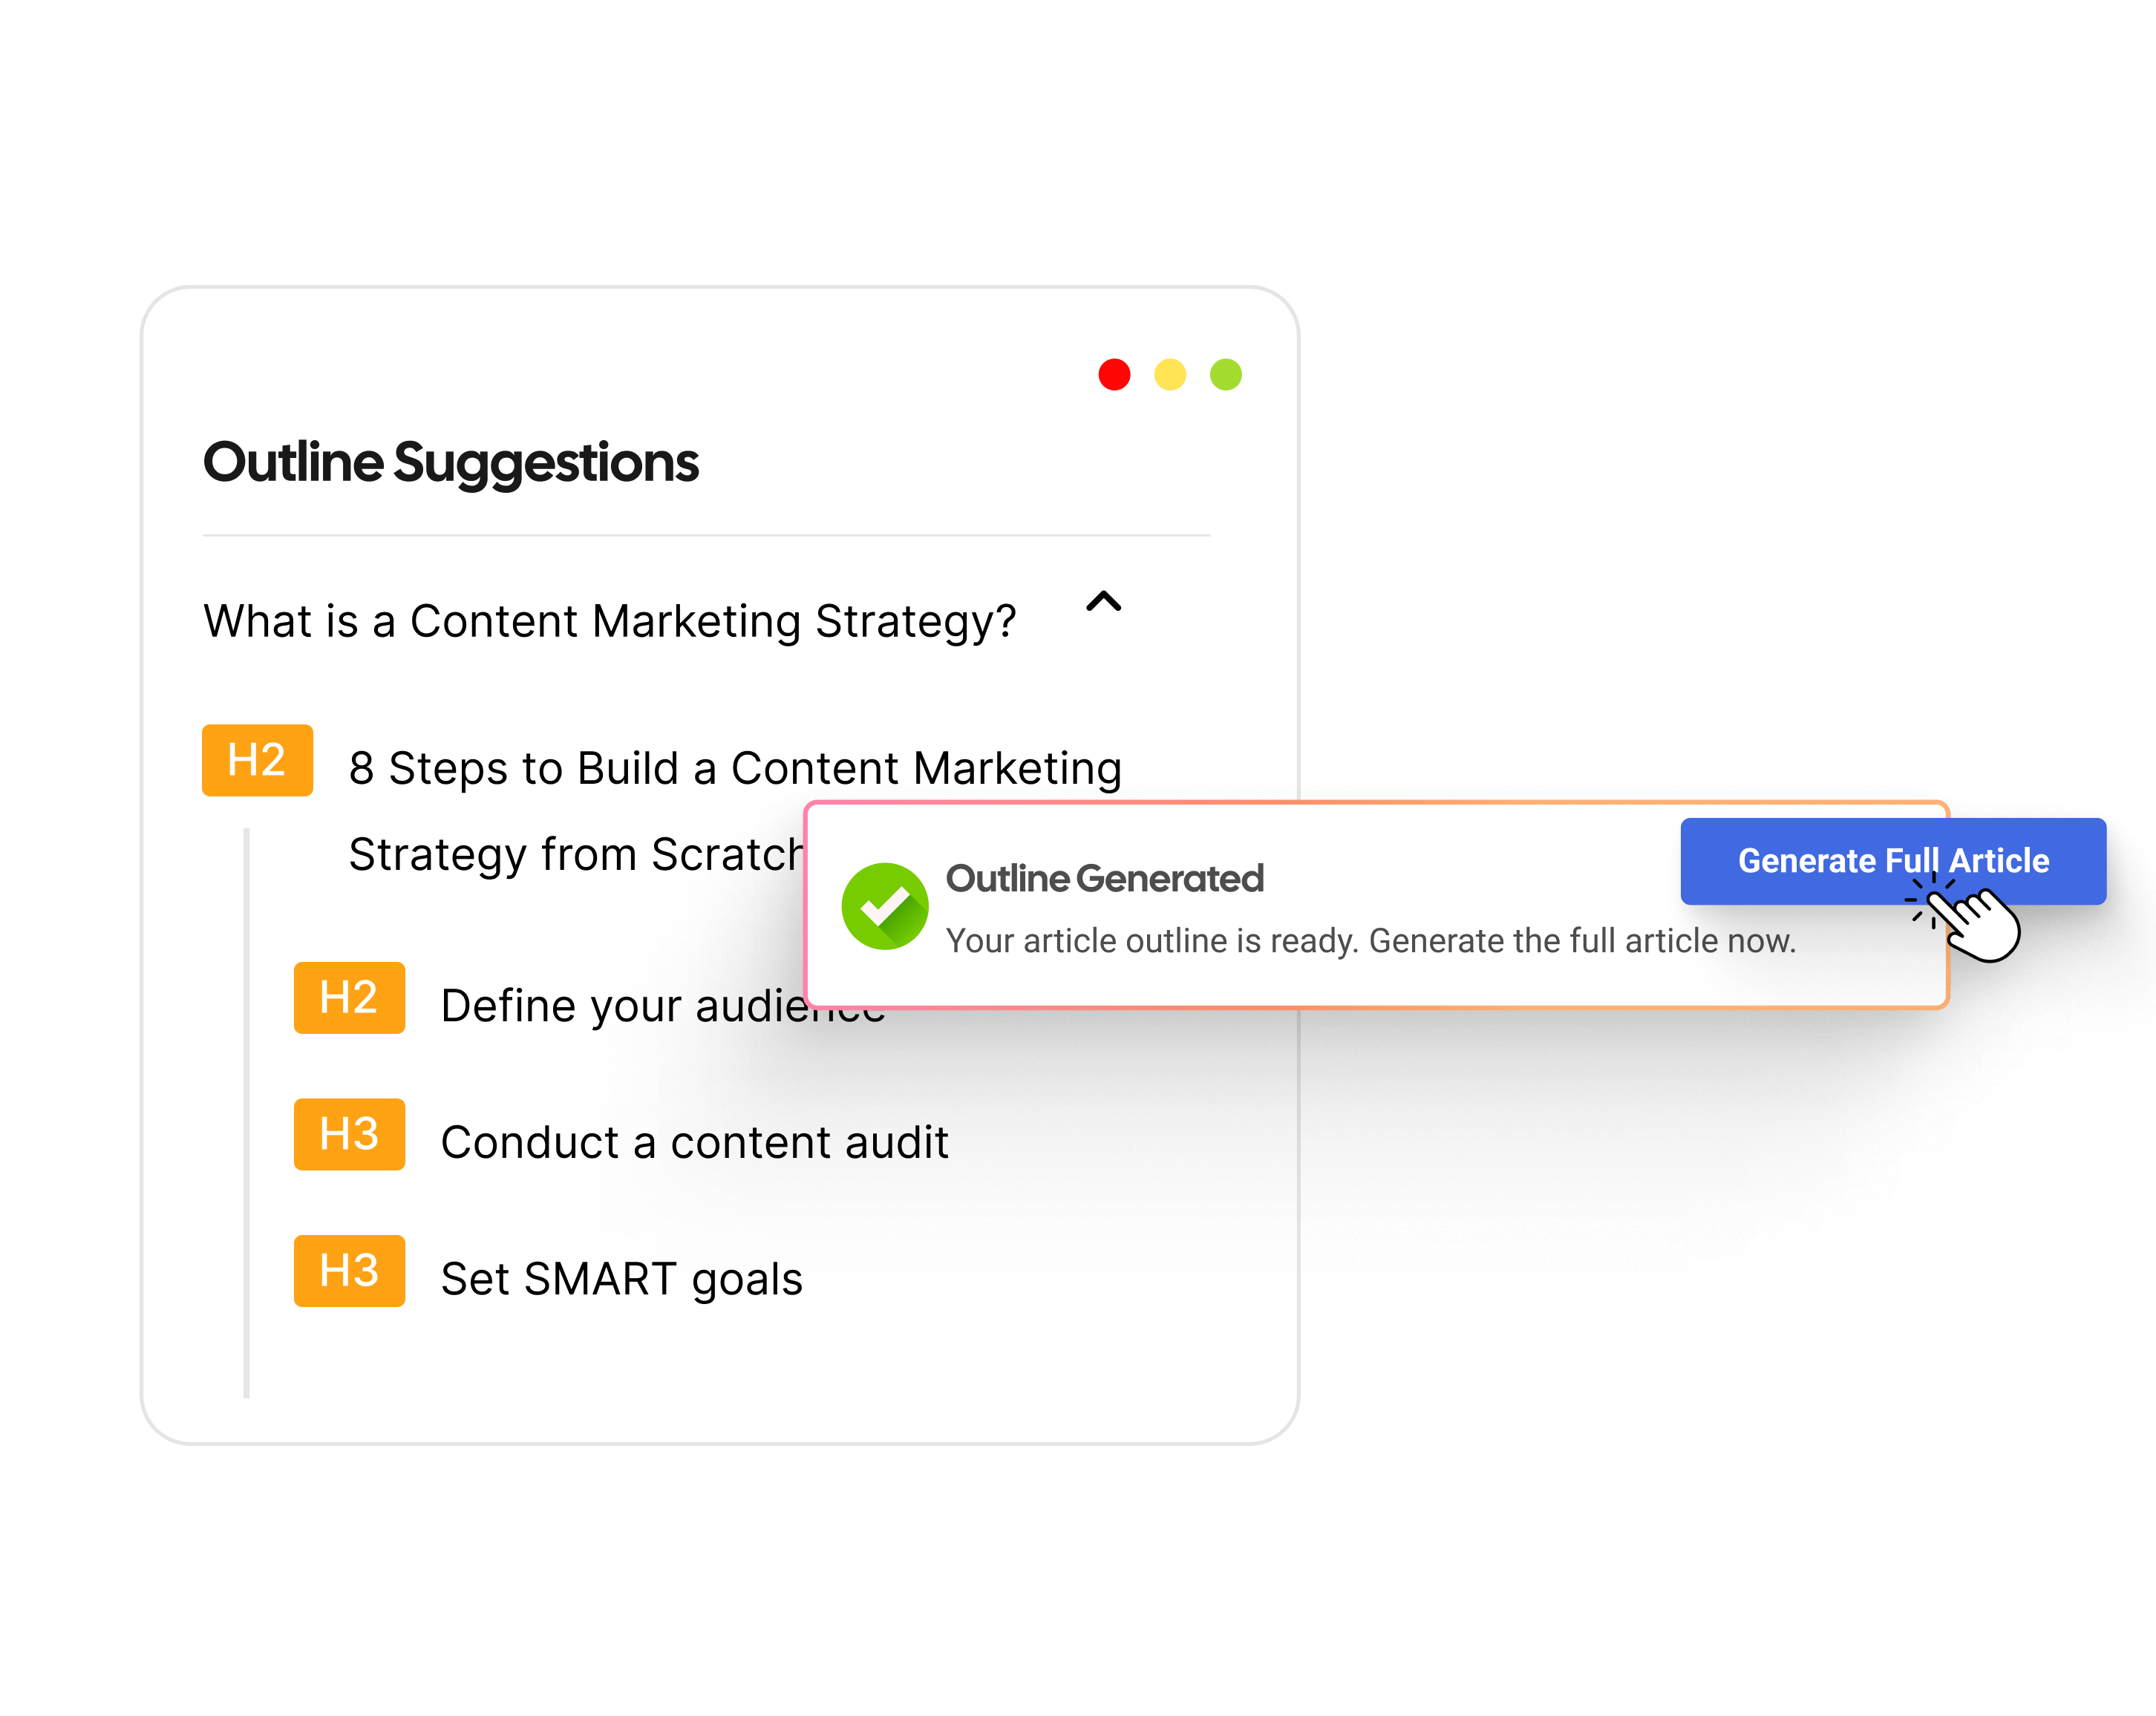
From outline to publish-ready content that fills them
Structured
Consistent
SEO-aligned
Fast